After years of writing this blog and sharing my knowledge and passion for traveling on a budget, this blog, in it’s current form is ending. Instead, of checking in here for tips and suggestions, photos and videos from around the world, I will be continuing to blog via Instagram. I can blog faster and more often. If you have questions or want a suggestion on where to go or what to do, please message me via Instagram.
Author: frugaltravelbug
Things to know about roadtripping across the USA
Do not bring fresh fruits and veggies across into the United States from Canada. We were not forewarned and we had some food confiscated. We were confused since there were giant signs about other items you cannot bring in the USA (guns, drugs, etc.).
Cell phone service is spotty near the National Parks in the west, especially once you get away from the highways. If you are in a caravan with other cars, think about using walkie talkies to communicate while driving and while hiking.
Things to know about American National Parks
On this trip, I visited four national parks (The Badlands, Yellowstone, Glacier, and Theodore Roosevelt). Here are a few suggestions I have after my visit.
Read the paperwork that you are given when entering the park. There’s a ton of interesting information in there!
Beware of wildlife and respect the distance guidelines the parks have set for visitors!
Carry bear spray when hiking and know how to use it. We hiked a lot of popular trails and visited the parks in July and we still saw fresh bear scat on the trails and heard of a handful of bear sightings while we were hiking.
Ask the park rangers all of your questions and ask for suggestions on things to do or see in the park. They are the most knowledgeable people on the subject.
Camping and hiking in Glacier National Park, Montana, USA
Glacier National Park has been a priority for my husband Kyle and I for a couple of years so we are so ecstatic that we could visit this summer. Originally, we wanted to camp in Many Glacier but when we tried to book the campsites 6 months in advance (which is as far out as they allow), we found that it was already completely booked. What we didn’t understand at the time was that the opening date for booking campsites is actually 6 months plus two weeks because you can book nights going forward two weeks. If we would have been traveling alone, we would have arrived at Many Glacier first thing in the morning (think 5a.m.) to try and snag one of the first come, first served campsites. But because we were a group of nine, we opted for booking a group site in Apgar at the south end of Lake McDonald. The group site at Apgar was really large as they accommodate between 9 and 25 people per site. The only down side to our location was being so close to the road. There was so traffic noise but nothing we couldn’t handle.
While at Glacier, we took full advantage of the hiking opportunities.
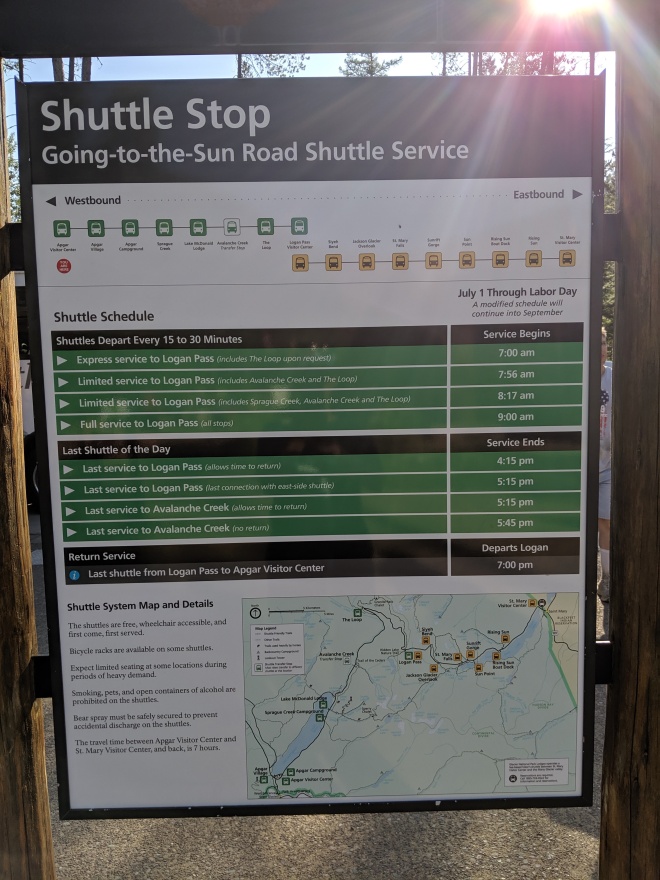
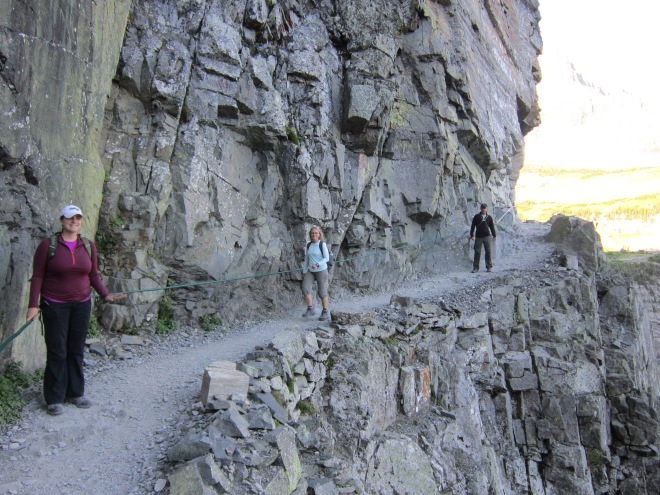
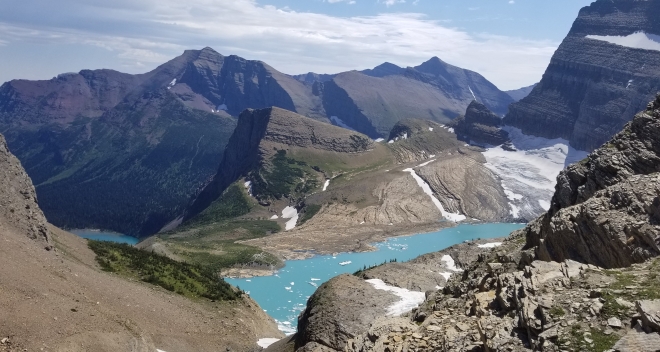
The Highline Trail starts across the street from the Logan Pass Parking lot in the middle of the Going To The Sun Road. The first part of the trail is along a steep cliff with no guard rails. There are some chains on the side to grab onto if you have issues with heights. After that, it opens up to a fairly open area where you have the best chance to see wildlife. We did not see much beyond ground squirrels and chipmunks, but others were much luckier. From there, we ascended a little ways to a snow covered area called Haystack Butte. After that, we walked a along an area called the Garden Wall and had the choice to either climb the wall or head to the Granite Park Chalet. The walk up the wall was very steep and went for almost a mile depending on how far you want to go. At the top, you have a nice view of the Grinnell Glacier and Upper Grinnell Lake. This was the main point of the hike and was worth the seemingly unending climb. Then it was back down from the Garden Wall and over to the Granite Park Chalet. There, they had bathrooms, tables, and snacks. Electricity was only available for powering the one refrigerator full of bottles of water and Gatorade. There was no kitchen on the premises, so your snacks options were limited to chips, candy bars, and Clif Bars. After the Chalet was the worst part of the hike; four miles downhill in an area that had burned down a number of years ago. There was no cover from the sun and very little to look at. The entire hike (with the Garden Wall addition was about 14 miles). From Apgar Campground, we took the earliest shuttle possible since parking at Logan Pass fills up quickly. Also keep in mind that the Highline trail is not a loop. It is a semi-circle that ends nowhere near Logan Pass. There is a shuttle pick up at the end of the trail but the shuttle’s last pick up is around 7p.m. So if you have not completed the hike by then, you are on your own.
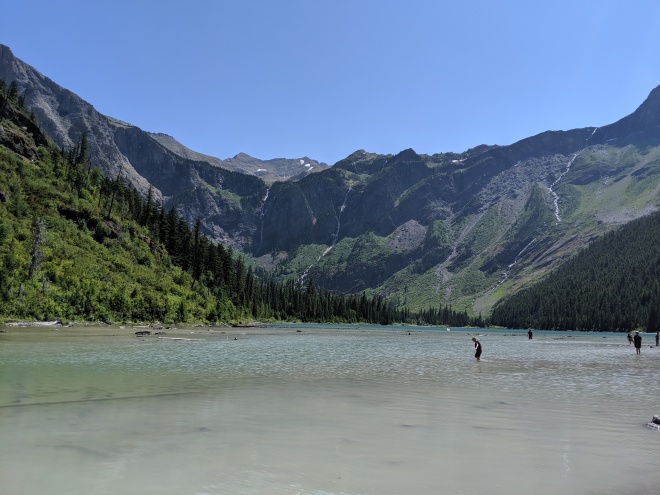
We also took the shuttle to hike to Avalanche Lake. This trail starts at the end of Trail of the Cedars, a short half-mile boardwalk that has a lot of plaques about the surrounding nature. At the back end of the Trail of the Cedars loop, the Avalanche Lake trail starts. It’s a moderate hike with some elevation but nothing too difficult. The pay off when you reach the lake is well worth it. This is one of the shorter hikes in Glacier so it is pretty popular. I would recommend going early or late in the day.
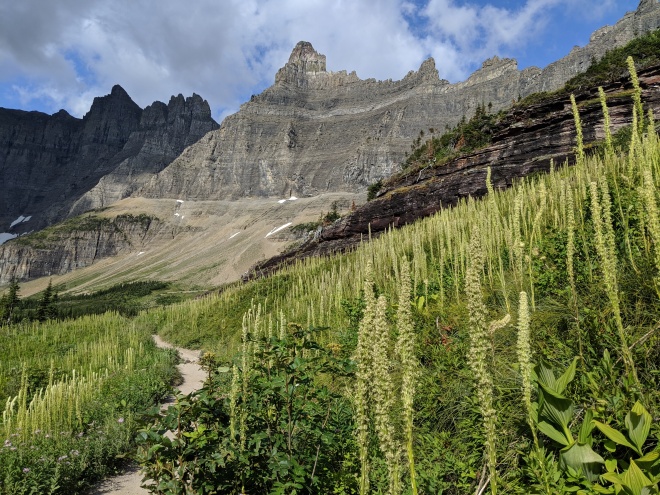
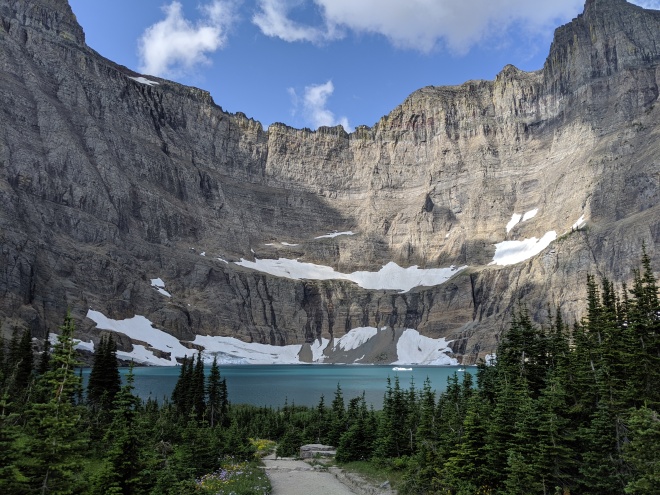
One morning we woke up early and drove the 2.5 hour drive (one way) to Many Glacier to hike to Iceberg Lake which starts behind the Swiftcurrent General Store. We read that the parking lot fills up quickly but there is a lot of parking available so I wouldn’t worry about it. The trail started with a quarter mile climb, but flattens out for the rest of the way. It winds through a pine forest where we got a glimpse of the Ptarmigan Falls. Shortly after that, we crossed a bridge that acted as a good place to rest and drink some water. Just after the bridge, there was a split in the trail that offered the choice of Iceberg Lake or Ptarmigan Tunnel. We chose Iceberg Lake, but heard that Ptarmigan Tunnel offered a good view of some glaciers and would have been a good addition if we felt like doing 15 miles that day (we didn’t). The Iceberg Lake trail opened up and gave a good view of Ptarmigan Wall which is the backdrop for the lake. Right before we reached the lake, there was a large wildflower field and a smaller runoff pond. It was considerably cooler near the lake so keep that in mind when preparing for this hike. We sat on some rocks and had a quick lunch then headed back. It was a busy trail but still well worth our time. And even with all the hikers, we kept hearing that others were spotting bears. We were glad to have bear spray with us even though we didn’t need to use it.
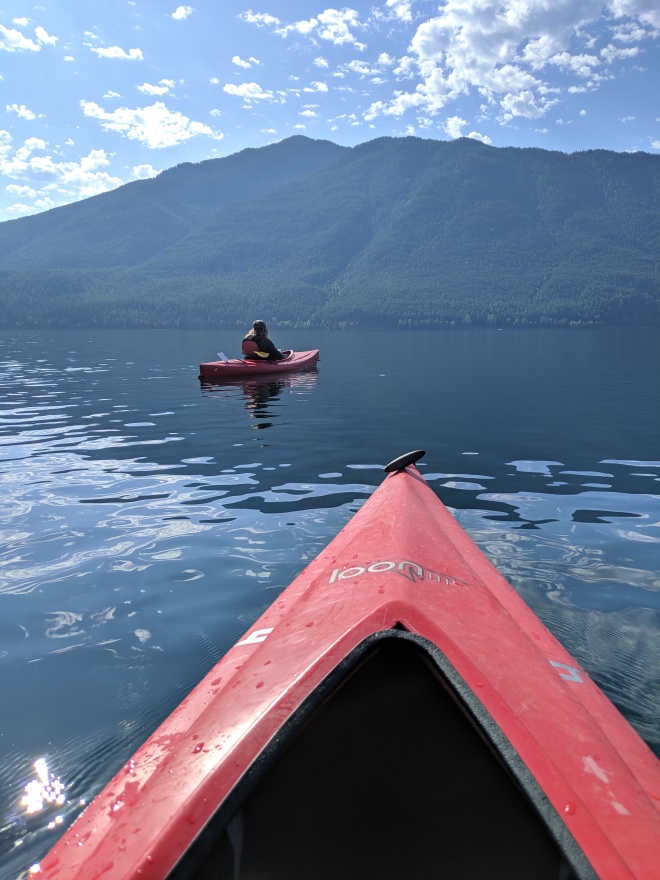
We kayaked on Lake McDonald one morning as well using the outfitter based in Apgar village. The kayaks they offered were in good shape and were more varied than what they offered on their website (sit atops as well as sit-ins). Instead of using the website (since cell phone service was spotty), I drove to Apgar village to talk to them. The transaction was easy and I was able to reserve a few boats for the next morning. Keep in mind that the outfitter is located away from the water and while they give you a kayak cart, you are expected to get your boat to and from the water on your own. This definitely cuts into your time on the water. We had a lovely time on the water and two hours was enough for our group to enjoy the bald eagles nesting nearby.
We did a lot of research on this park. Here are a few of the sites that helped us plan.
http://www.hikinginglacier.com/highline-loop.htm
http://www.hikinginglacier.com/avalanche-lake.htm
http://www.hikinginglacier.com/iceberg-lake.htm
Here are some other hikes that we looked at but didn’t have time to complete.
http://www.hikinginglacier.com/siyeh-pass.htm
http://www.hikinginglacier.com/pitamakan-pass.htm
Camping and hiking in Yellowstone National Park
On route to Yellowstone, we stayed a night in the town of Cody, Wyoming to break up the camping. We booked an apartment at the Big Bear Lodge. What we didn’t understand until we arrived was that our apartment was not at the location with the large wooden bear sculpture out front (also where the free pony rides are offered), but about 3 miles away, which happened to be much closer to the town center. As a group, we had mixed feelings about this. On one hand, we were happy to be closer to bars and restaurants. And on the other hand, the hotel location did have laundry, pony rides, and live music at night. So while I would recommend staying at Big Bear, I would make sure you know which location you will be at (and which one you prefer).
From Cody, we drove to Yellowstone and took the scenic tour down from the northwest entrance towards Tower Junction and down the main road. There wasn’t a lot of traffic but there was a lot more wildlife in the north of the park than we saw in the southern part of the park. Had we known this, we would have taken more time in the north.
We camped in Grant Village for two nights which we had to book one year in advance. When you book your campsites at Yellowstone, they do not assign them until a few days ahead of time. Also, as we needed three camping sites, our sites were not next to each other but were in the same loop.
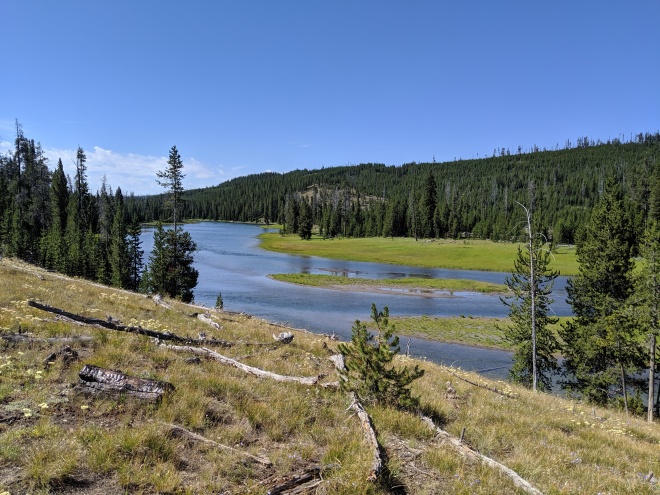
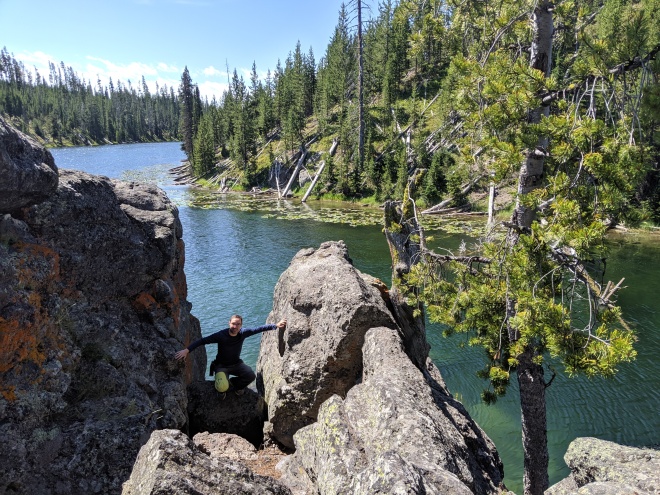
We spent most of our time in Yellowstone driving around and visiting the scenic overlooks and taking small hikes. One day, a few of us hiked the 10-mile loop hike of Dogshead Channel and Lewis Lake. The trail was relatively flat and mostly well marked. We visited two lakes, Shoshone Lake and Lewis Lake, and hiked along the river that connected the two lakes for a while. The day we were on the trail, we saw more kayaks and canoes than other hikers.
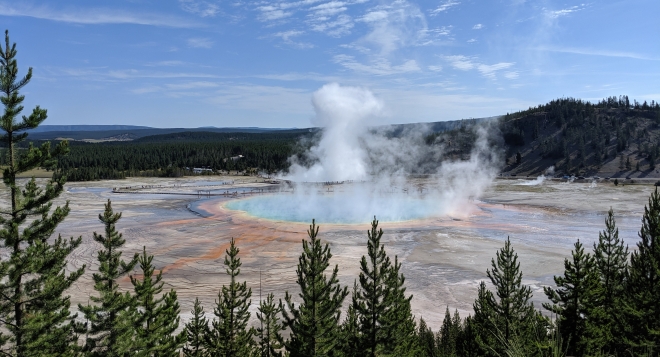
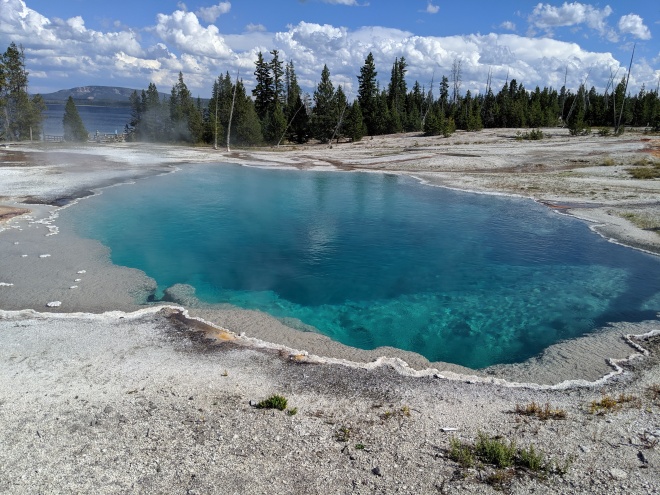
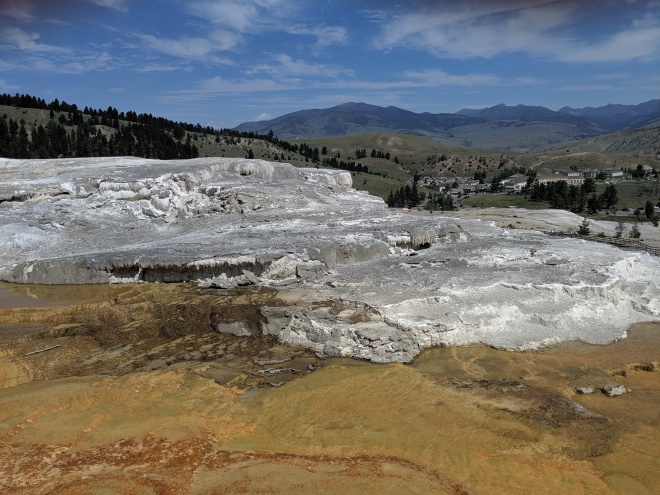
One thing I would recommend is talking a park ranger about less visited sites like geysers and thermal pools. We visited the Grand Prismatic Spring. And while it was beautiful, it was also very crowded and parking was a nightmare.
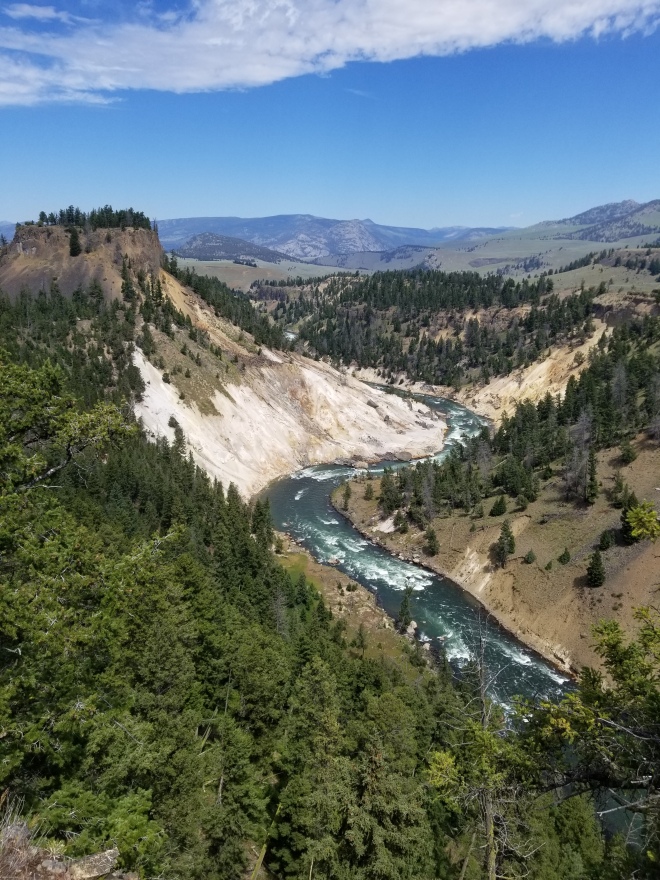
We also visited the Upper and Lower Falls of Yellowstone. We stopped to see the Big waterfalls and wanted to get a better look by doing that staircase hike, but it was closed.
Below is a link that helped us plan our trip. There’s also a link to an amazing company selling t-shirts and other National Park inspired items. They donate 4% of their proceeds to support “America’s most wild and historic places.” Check them out. I bought a t-shirt and have been very happy with my purchase.
https://www.trailguidesyellowstone.com/yellowstone_hikes/yellowstone_day_hikes.php
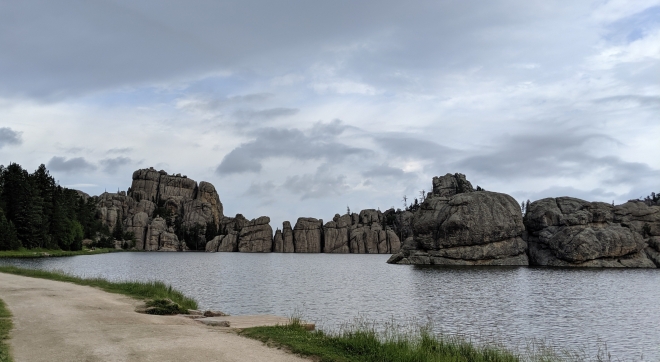
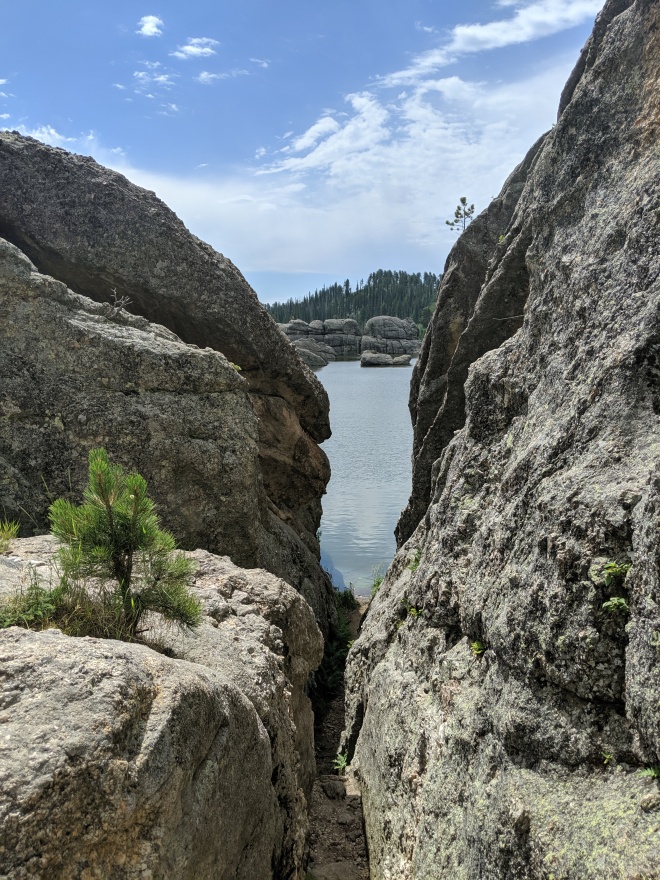
Black Hills, South Dakota, USA
Some friends and I decided to roadtrip from Chicago to Banff this summer with stops along the way a few of the American National Parks. We hiked and camped and stayed in hotels all the while basking in the changing landscapes we were surrounded by.
At the beginning of the trip, we camped at Sylvan Lake in Custer State Park for two nights staying in SL 18, 19, & 20. Our campsites were somewhat secluded which we enjoyed and up a small hill which we didn’t mind. While there, we swam in the lake and hiked the Sunday Gulch trail. The trail was more difficult than I was expecting but it was a rewarding hike. I would recommend doing this loop hike clockwise as one end can be a bit wet and you would end up hiking down boulders with rushing water if you hike counter-clockwise.
We visited Mount Rushmore while in the area. The monument is free to visit but you must pay a $10 per car fee to park. I, personally, was disappointed with our visit. There were far too many people and part of the viewing area was under construction.
We also visited the town of Custer, WY. On a rainy afternoon, we popped into the local VFW (which is open to the public) for a few drinks. There was a food truck out front with Mexican food so we grabbed a bite to eat and enjoyed the covered outdoor seating for as long as we could (before the rain became too heavy).
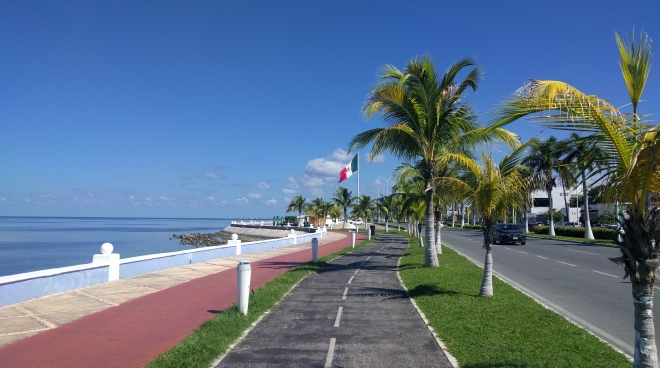
Campeche, Mexico
After a handful of days in Mérida, my friend and I made our way to the sleepy town of Campeche. When we arrived, we took a taxi from the bus station to our Airbnb. The ride cost about $45MXN.
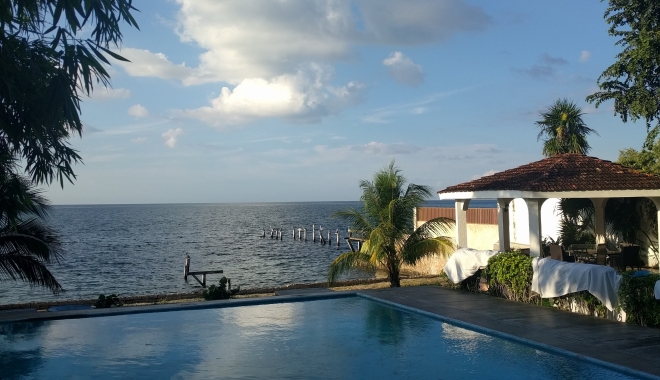
We stayed in an Airbnb for four nights. It’s located about two miles outside of the city center but is accessible by bus and taxi. Our host was very friendly and showed us around the property. There is a pool (though unheated), a patio, and the Gulf of Mexico right in the backyard. The water is calm and warm though there are rocks in the water so I recommend wearing water shoes. Since we had a kitchen in the apartment, we walked to a supermarket nearby and grabbed some groceries. We stayed in for a handful of meals to save some money.
When we did go into town, we ate some amazing food. One of my favorite meals was at La Olla de la Pagoda. My friend and I were given a complimentary cup of zucchini soup with pesto that was jaw-droppingly good. Our entrees were also delicious and affordable at about $70MXN each. I wish we would have gone back a second time.
We stopped at Restaurant Los Abuelos for lunch one day and were not disappointed. Our meals, enchiladas verdes and a chile relleno, were flavorful and enormous. Our total bill with drinks was around $180MXN.
We also grabbed coffee at Café Sotavento. We didn’t eat there but the food looked fantastic.
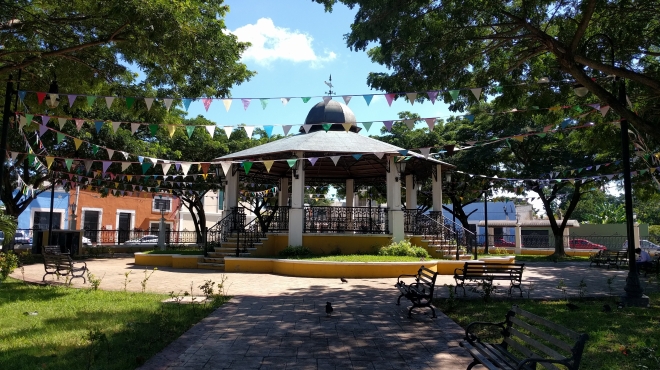
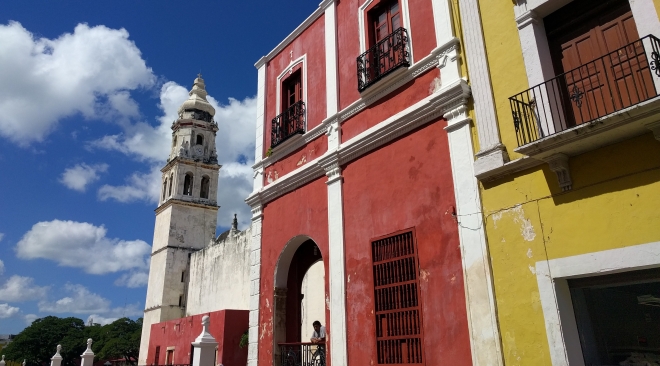
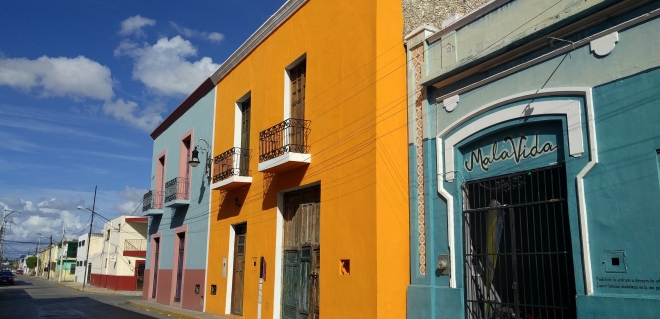
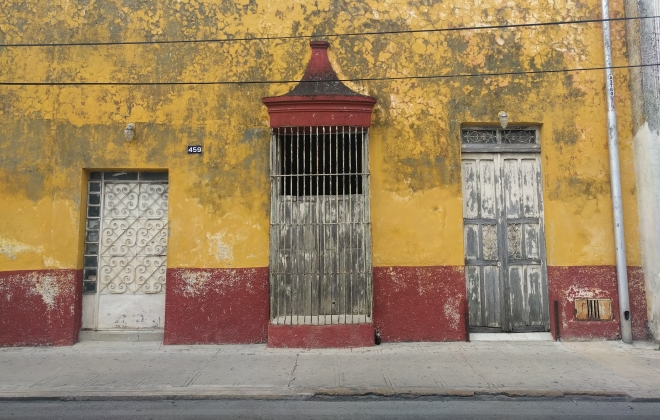
We wandered around Campeche and enjoyed the colorful buildings and architecture. We also did a little shopping while in town. We wandered into Casa de Artesanias Tukulna but were actually more impressed with the handmade options in a store across the street. I didn’t get the name of the shop but they sell beautiful jewelry, textiles, and gems. I highly recommend stopping in.
Our few days in Campeche were very relaxing though I think it helped that there were no cruise ships pulling into Progreso while we were in Campeche. I definitely recommend checking the cruise ship schedule ahead of time and then plan accordingly. It can get very busy and crowded. I can’t wait to go back and continue exploring Campeche and the area.
Mérida, Mexico
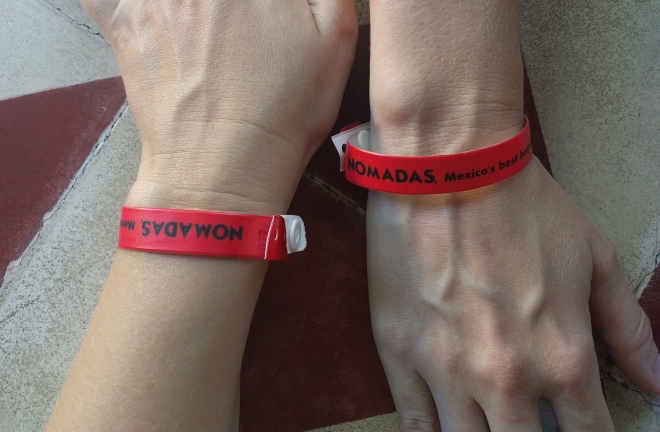
I spent a handful of days with friends in Mérida and really enjoyed the town. We stayed at the Nomadas Hostel to save a little money. If the hostel didn’t have a pool, I can’t say I would stay there again. The rooms were acceptable but the free breakfast was not good and the customer service at the front desk was poor. Also, we had to wear wristbands while staying there. People kept asking us if we were staying at an all inclusive or if we’d been at a rave.
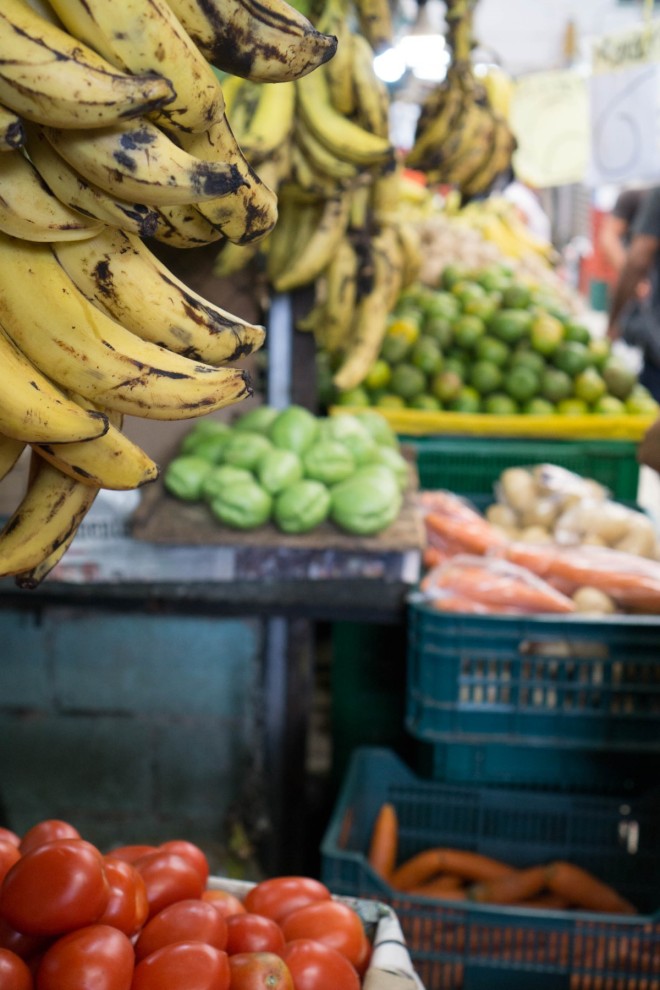
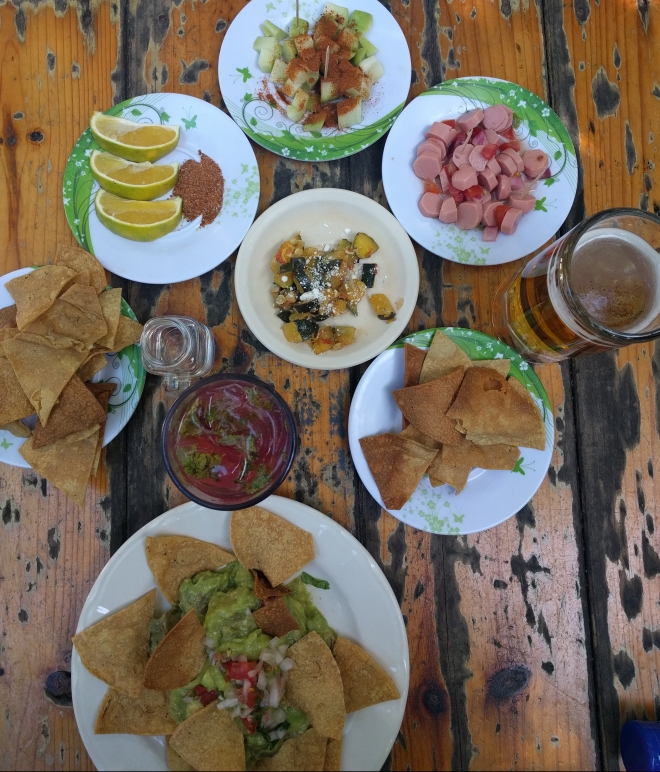
We spent our days wandering around town, eating and drinking, and lounging by the pool at the hostel. We visited Mercado San Benito a handful of times for some cheap food.
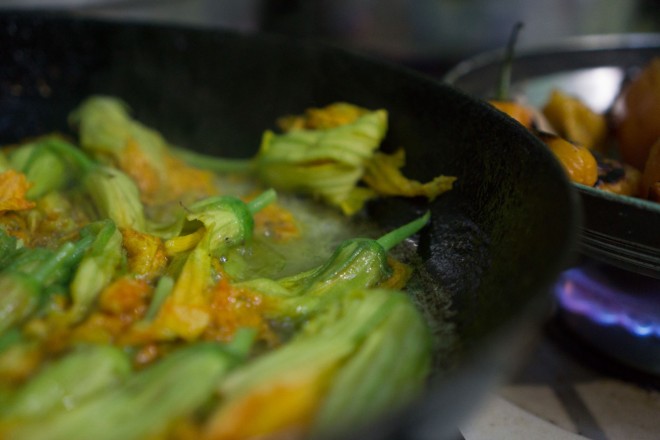
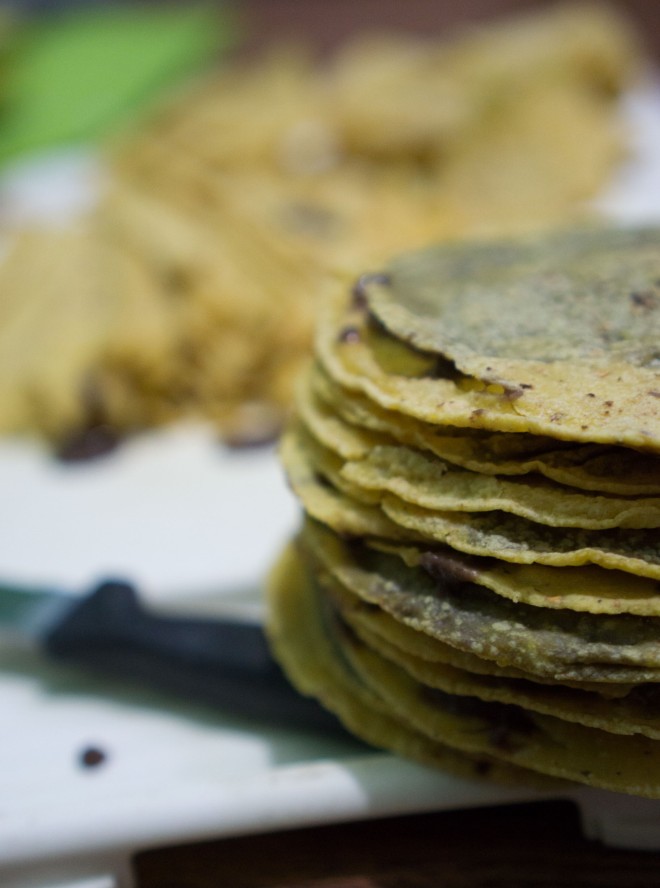
We also took a cooking class with Urban Adventures. We toured the market with Gustavo then went to his aunt’s house for a cooking lesson. Once all the food was ready, we ate an amazing meal together as a group. This was definitely a highlight of my time in Mérida.
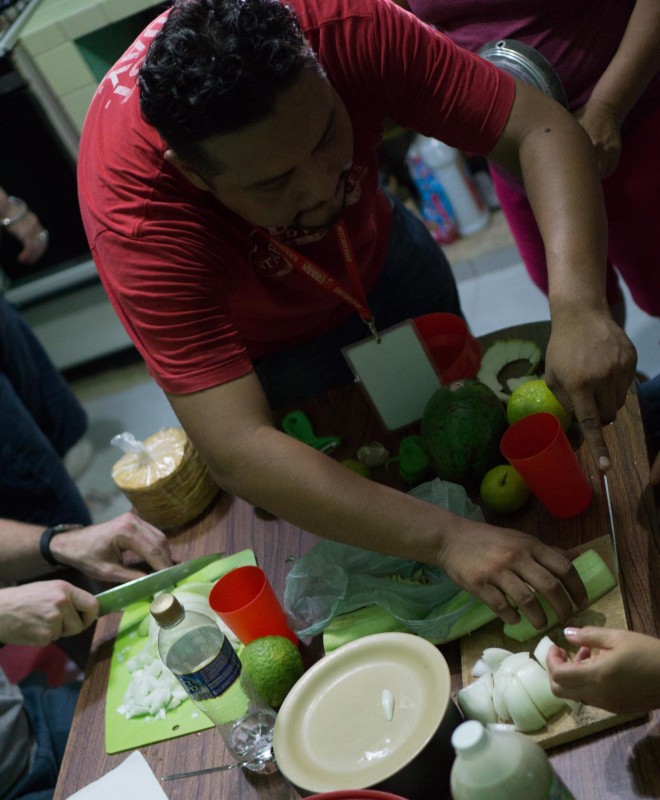
Thanks to the lovely and talented Pamela Dawn for sharing her amazing photos with me. Find her Instagram feed here.
Along with the cooking class with it’s delicious local dishes, we kept eating (and drinking) our way around Mérida.
We stopped by Huevos Motuleños twice for breakfast. The food and the service were outstanding. The main dining room is small but there is additional seating and an outdoor terrace upstairs.
We popped into La Negrita Cantina for drinks and enjoyed the lively atmosphere. We also visited Mercado 60 for a drink and some food. It was fun but more expensive than I think it’s worth.
When we needed a light snack or meal, we’d walk down to Gorditas Doña Gorda. The gorditas are small; one is a perfect snack, 2-3 work for a light meal. Each gordita costs around $15MXN. Also, they have a handful of vegetarian options on the menu.
For delicious tacos, we visited Wayan´e. There are a handful of locations but we went to the one on Calle 59. I ordered three tacos and a Coke. They were filling and my lunch only cost $42MXN.

We stayed in town for most of our visit but did spend an afternoon at the beach in Progreso. We hopped on a bus ($38MXN roundtrip) and were there in about 45 minutes. The beach was clean and not too crowded for such a hot day.
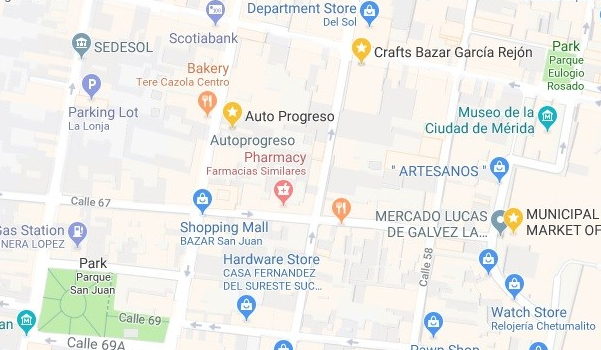
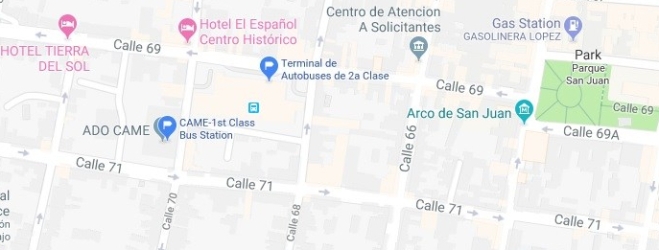
When I started planning my next move, I wanted to know all of my bus options. As I’ve mentioned in a past blog, the bus companies in Mexico (ADO and and it’s subsidiaries) are getting organized and a little more expensive. In Mérida there are two different bus stations one for the 1st class buses; another for the 2nd class buses. They are near each other so that makes it easier. And while they offer the same routes, the departure times, trip lengths, and, of course, prices are very different. To get from Mérida to Campeche, I chose to take a 1st class bus (but not the Platinum option) which cost about $127MXN one way. ADO also has an app that you can download but the ticket prices are a tad higher, maybe an extra $1-3USD per ticket. This is also true of purchasing tickets through their website. If you have the option, I recommend buying tickets at the bus station so you can save a little money and this way you know exactly where you need to be. I found another blog that covers the ADO bus system in more detail. I recommend checking it out if you plan on taking a lot of buses around Mexico.
Ghent, Belgium
Ghent had so much more to offer than I was expecting. I thought it would be a sleepy, little town where I would get bored after a few days. But that definitely was not the case. After five days, I kept finding more places I wanted to check out and I couldn’t fit everything in. I also found that the tourism website was very helpful, more so than I expected. I recommend visiting it for practical information as well as recommendations around town.
For the first two days, I was on my own and stayed at the Kaba Hostel. While I had a great stay there, it was further from the city center than I would have liked. But it also gave me a chance to check out the Southeast side of town before I moved to an Airbnb with a friend on the North side of town.
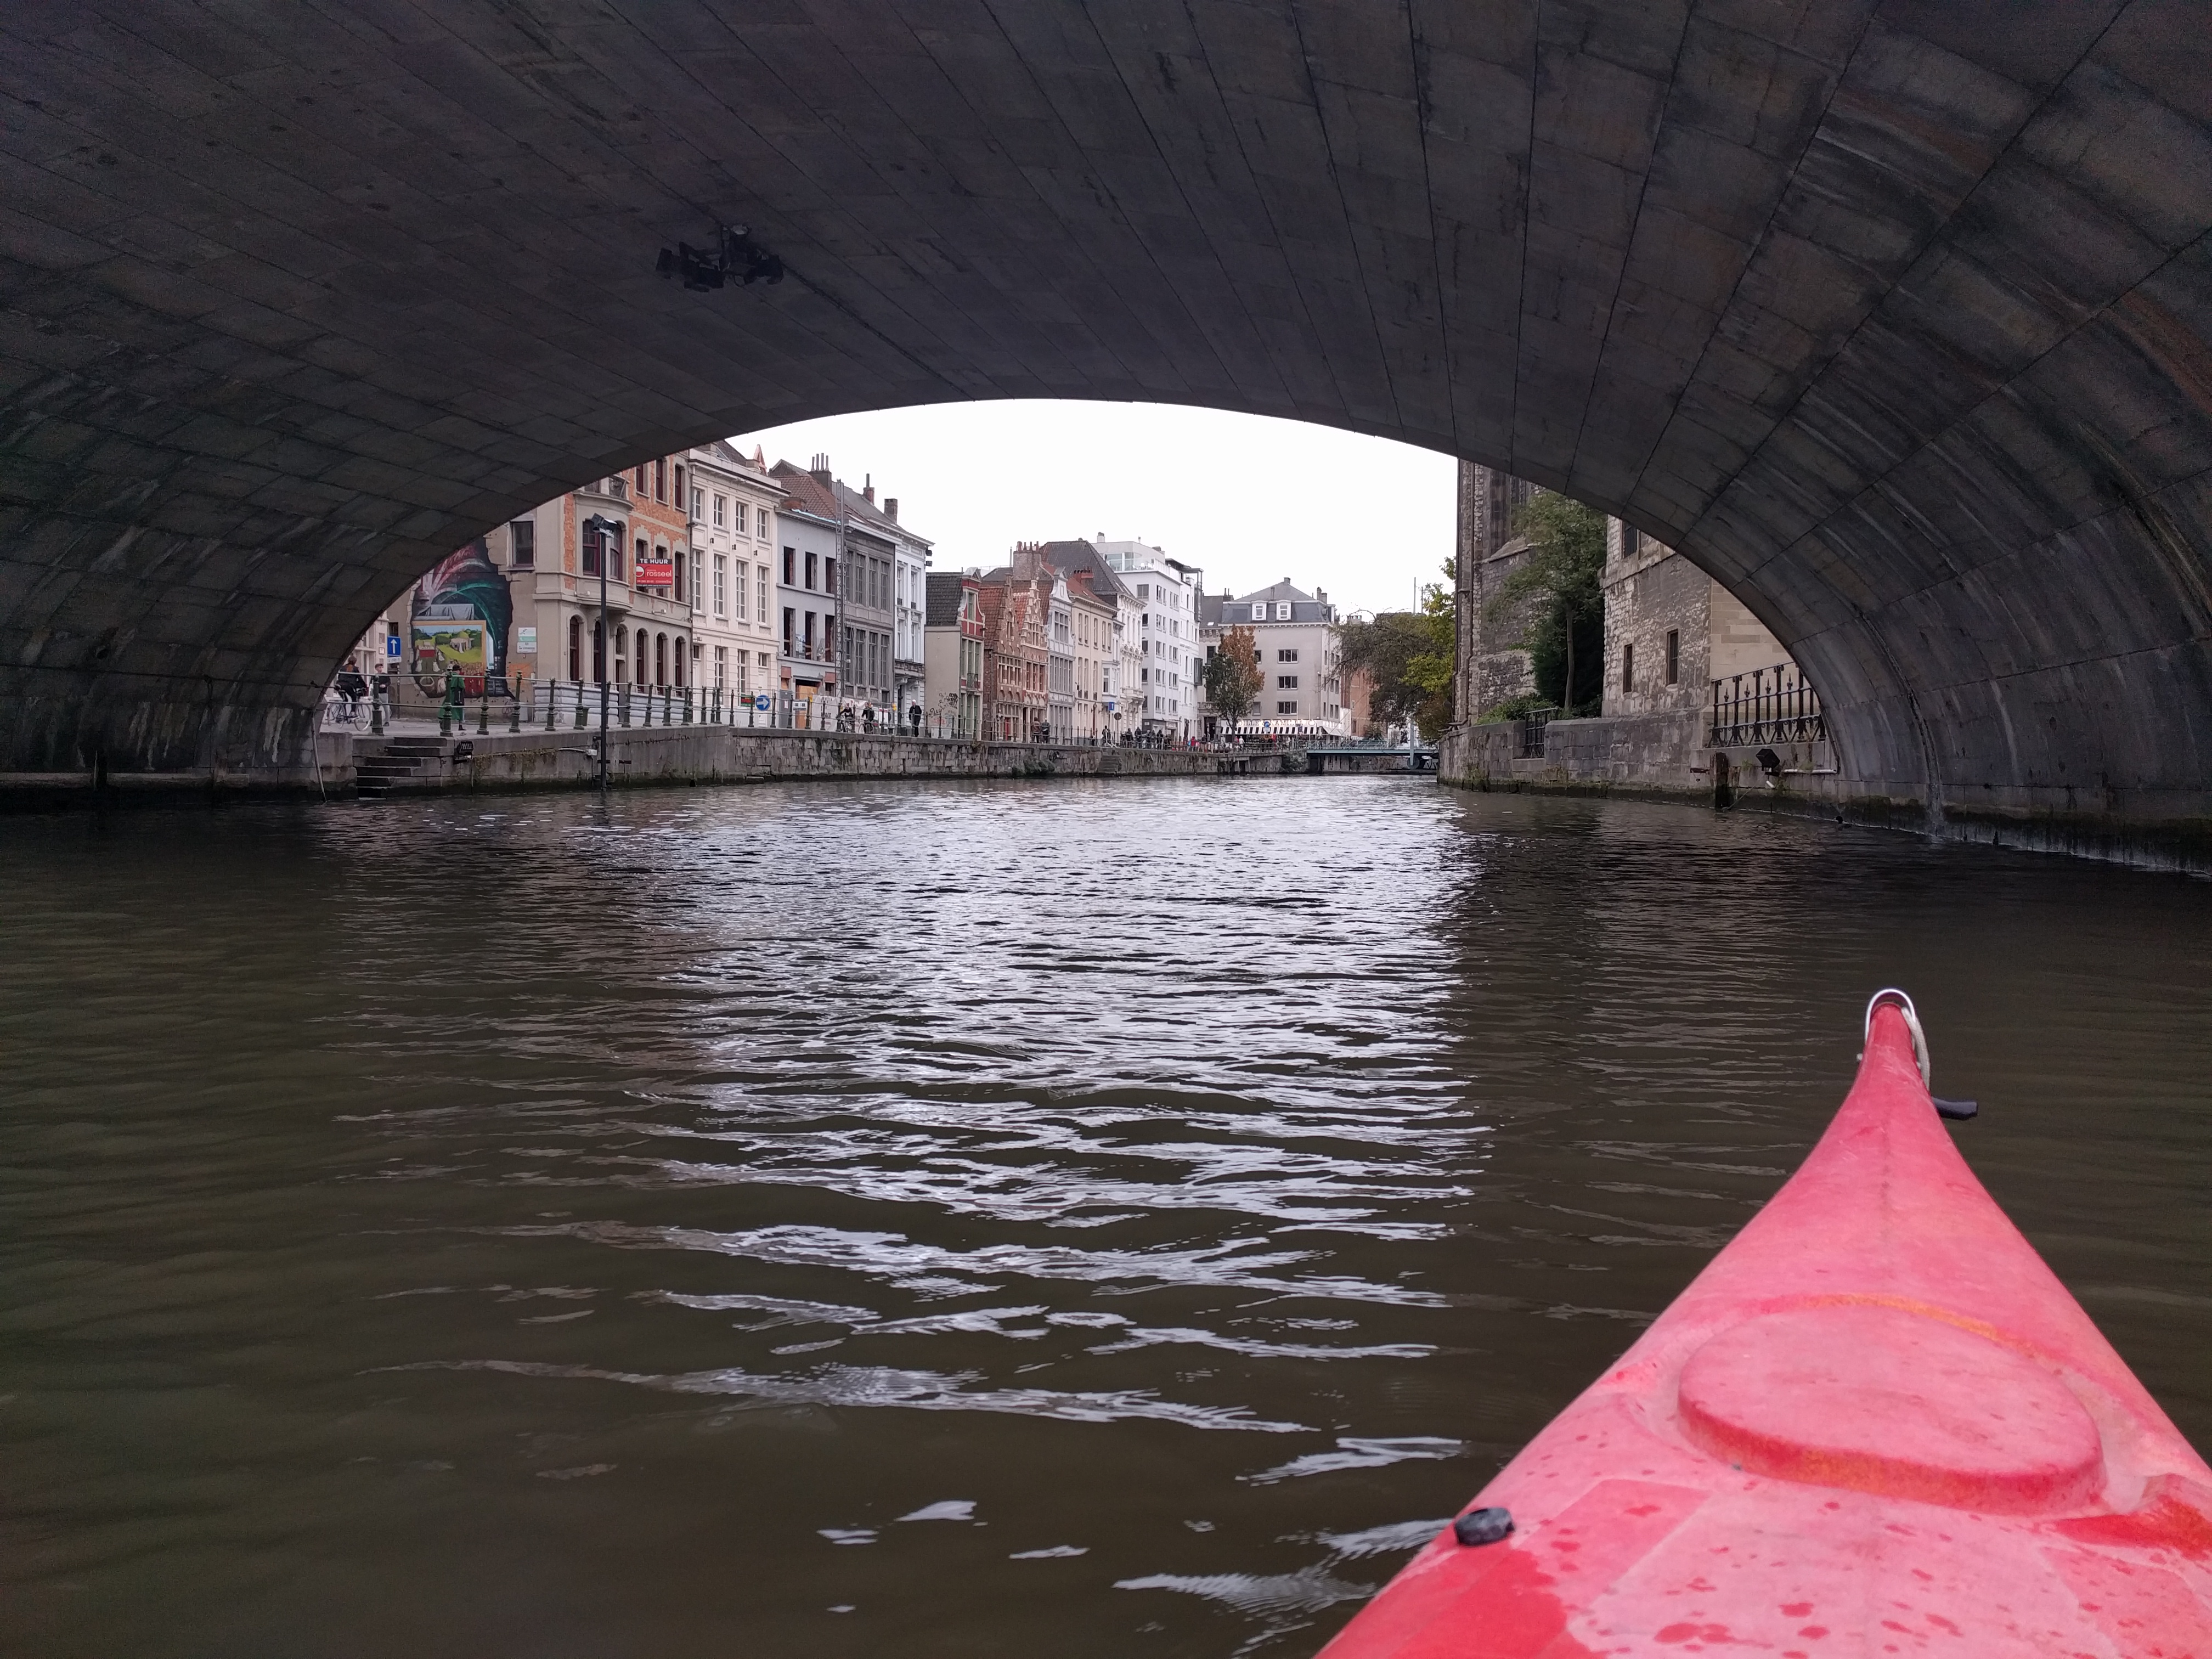
While in town, I took advantage of the good weather and wandered and meandered everywhere. I also took a boat tour, a free walking tour, and even rented a kayak from Hostel Uppelink.
I also took a free night walking tour. The guide, Ben, had a lot of very interesting history and knowledge about the city. And he timed the tour to end just at midnight.
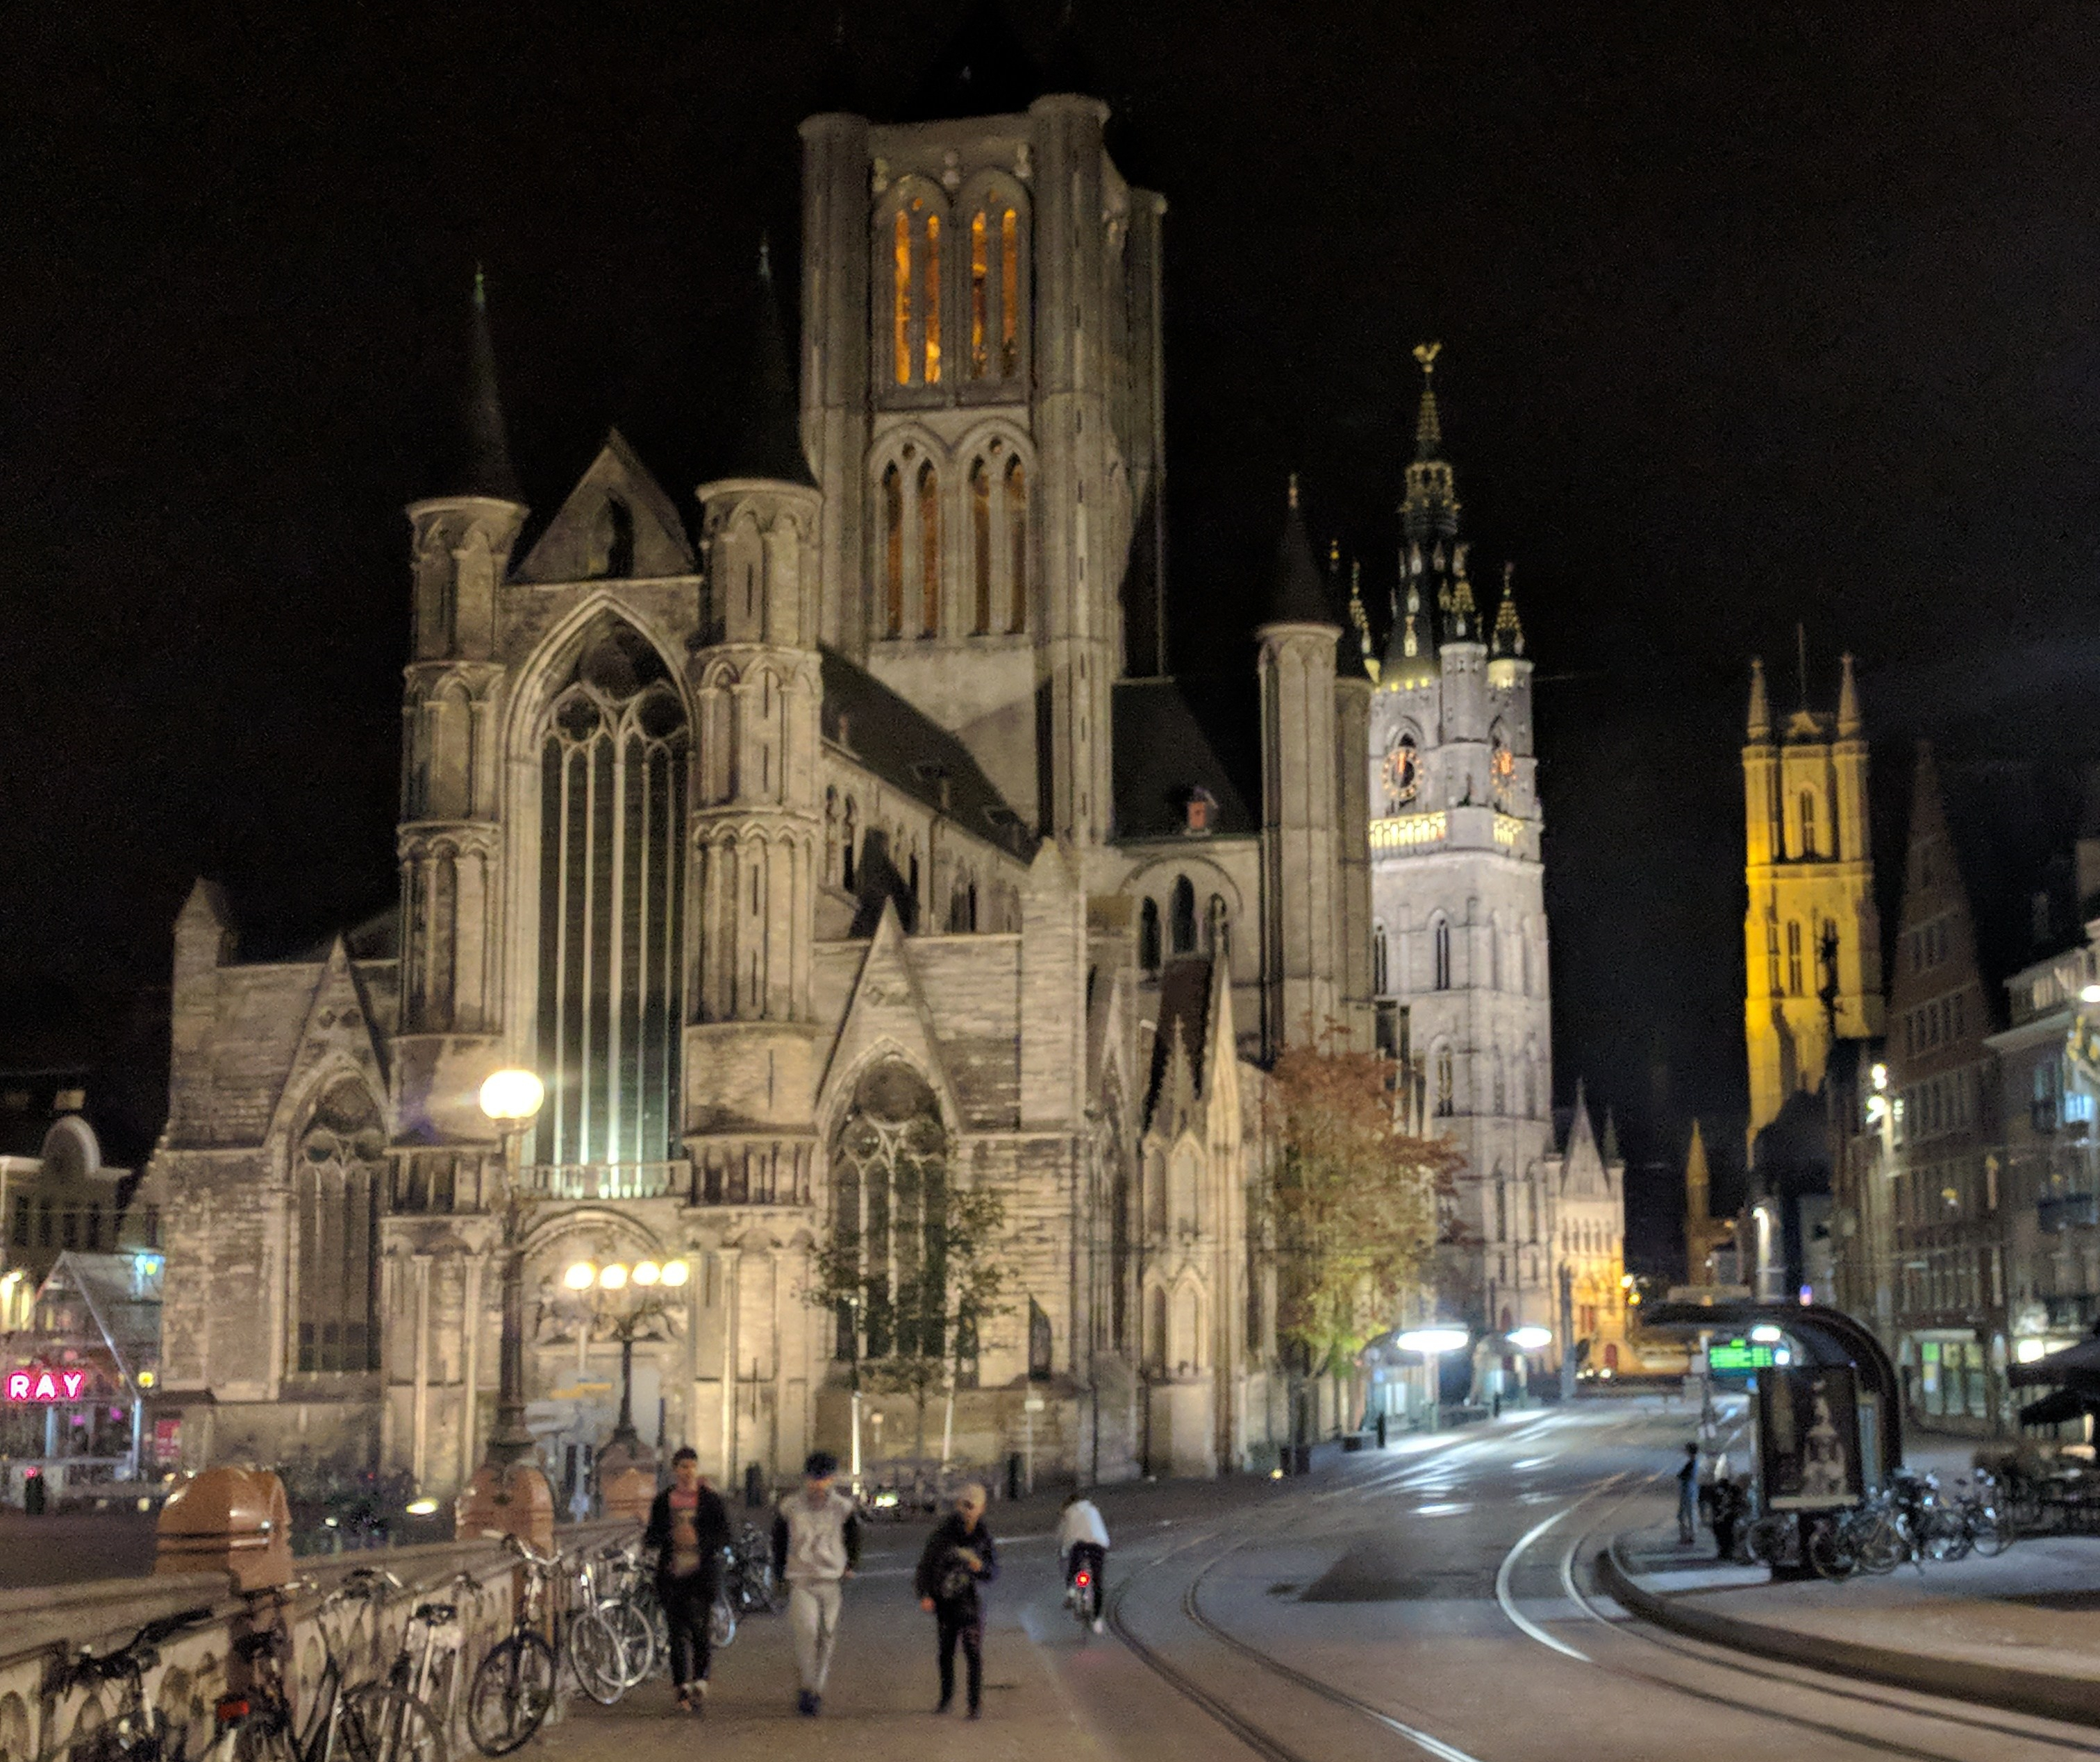
I visited all of the churches in town and, of course, the Ghent Alterpiece (Adoration of the Mystic Lamb). For art lovers, this is essential. For everyone else, it’s also essential. Pay the €4, listen to the audio guide (offered in a bunch of languages), and learn about the incredibly interesting history of this artwork.
I also visited the Museum voor Schone Kunsten for an exhibition called Women of the Baroque. The entrance fee for both the permanent exhibit and the temporary exhibits was €14. All of the exhibits were wonderfully curated. I was also able to see the panels from the Ghent Alterpiece that were being restored.
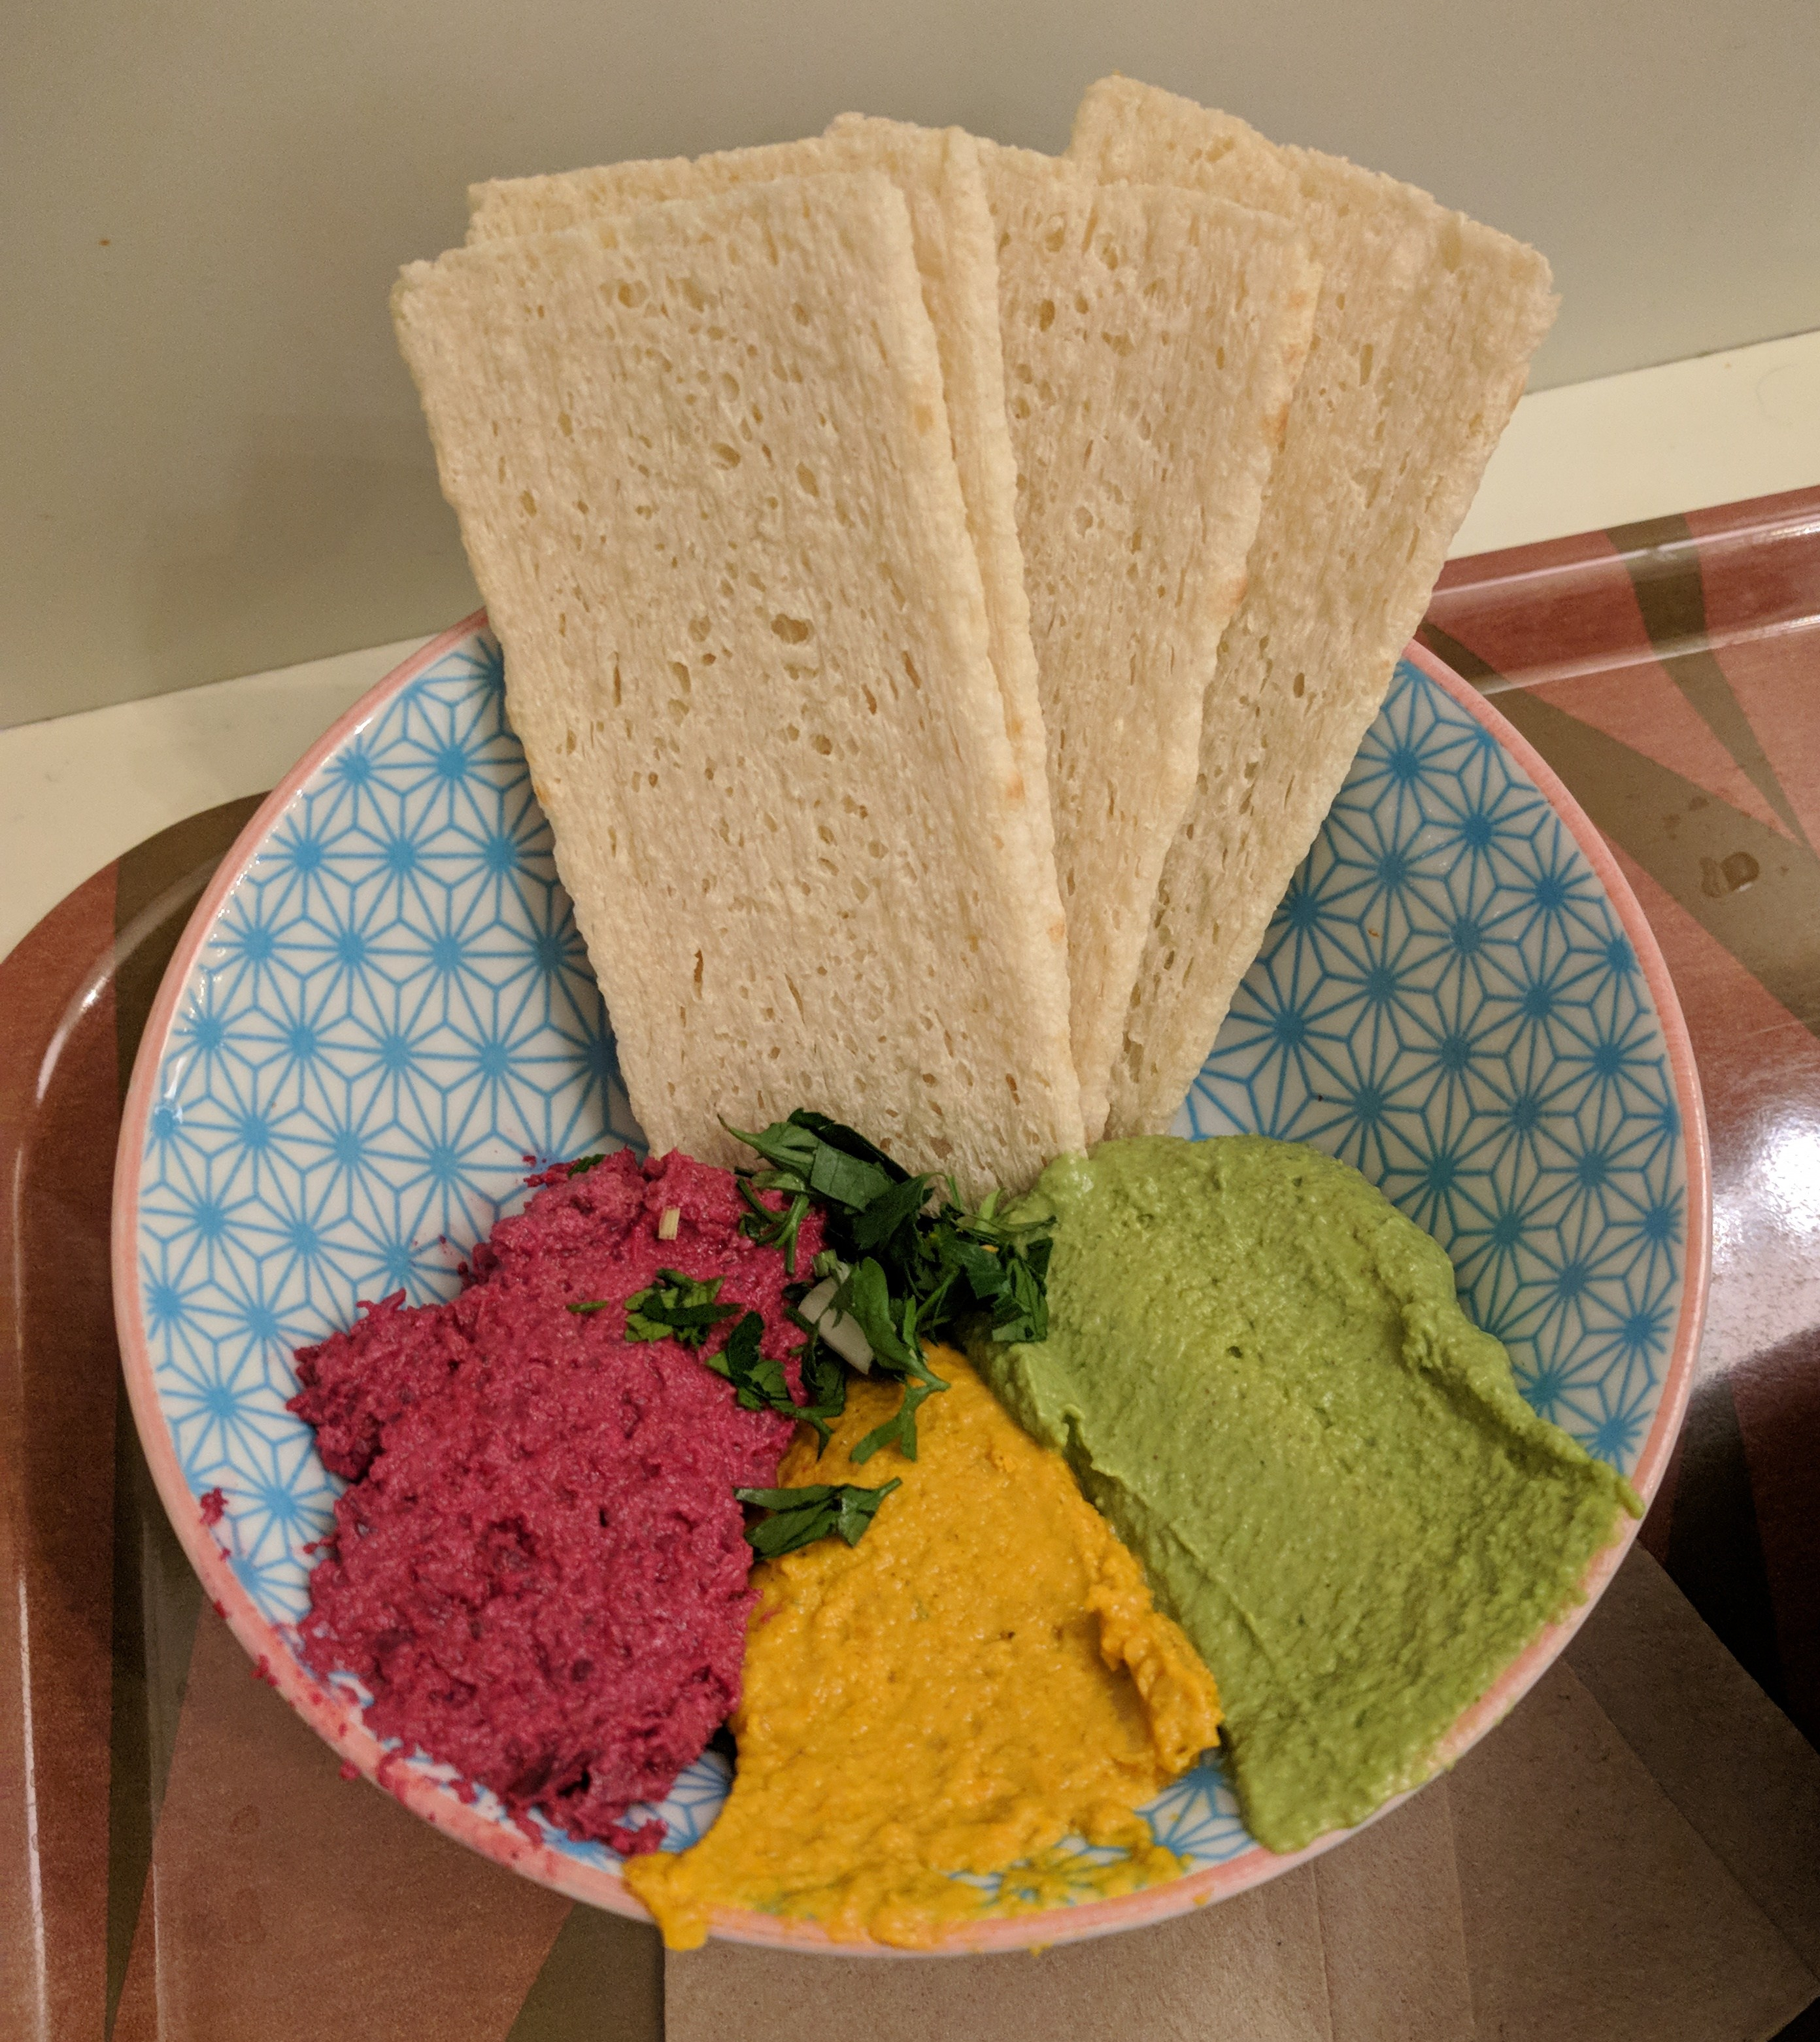
But more than anything, I enjoyed the food in Ghent. The city has fully embraced the local and organic food movements. There are food co-ops, farm to table restaurants, and vegetarian options galore. My favorites where Lokaal, Soep Plus, and Le Botaniste. Note that Le Botaniste looks really fancy from the outside but is actually very casual. All three of these restaurants were affordable, healthy, and delicious.
I also checked out a few of the organic markets. My favorite was the Beo Markt. They do have a restaurant thought I didn’t eat there, I did buy delicious fruit and vegetables.
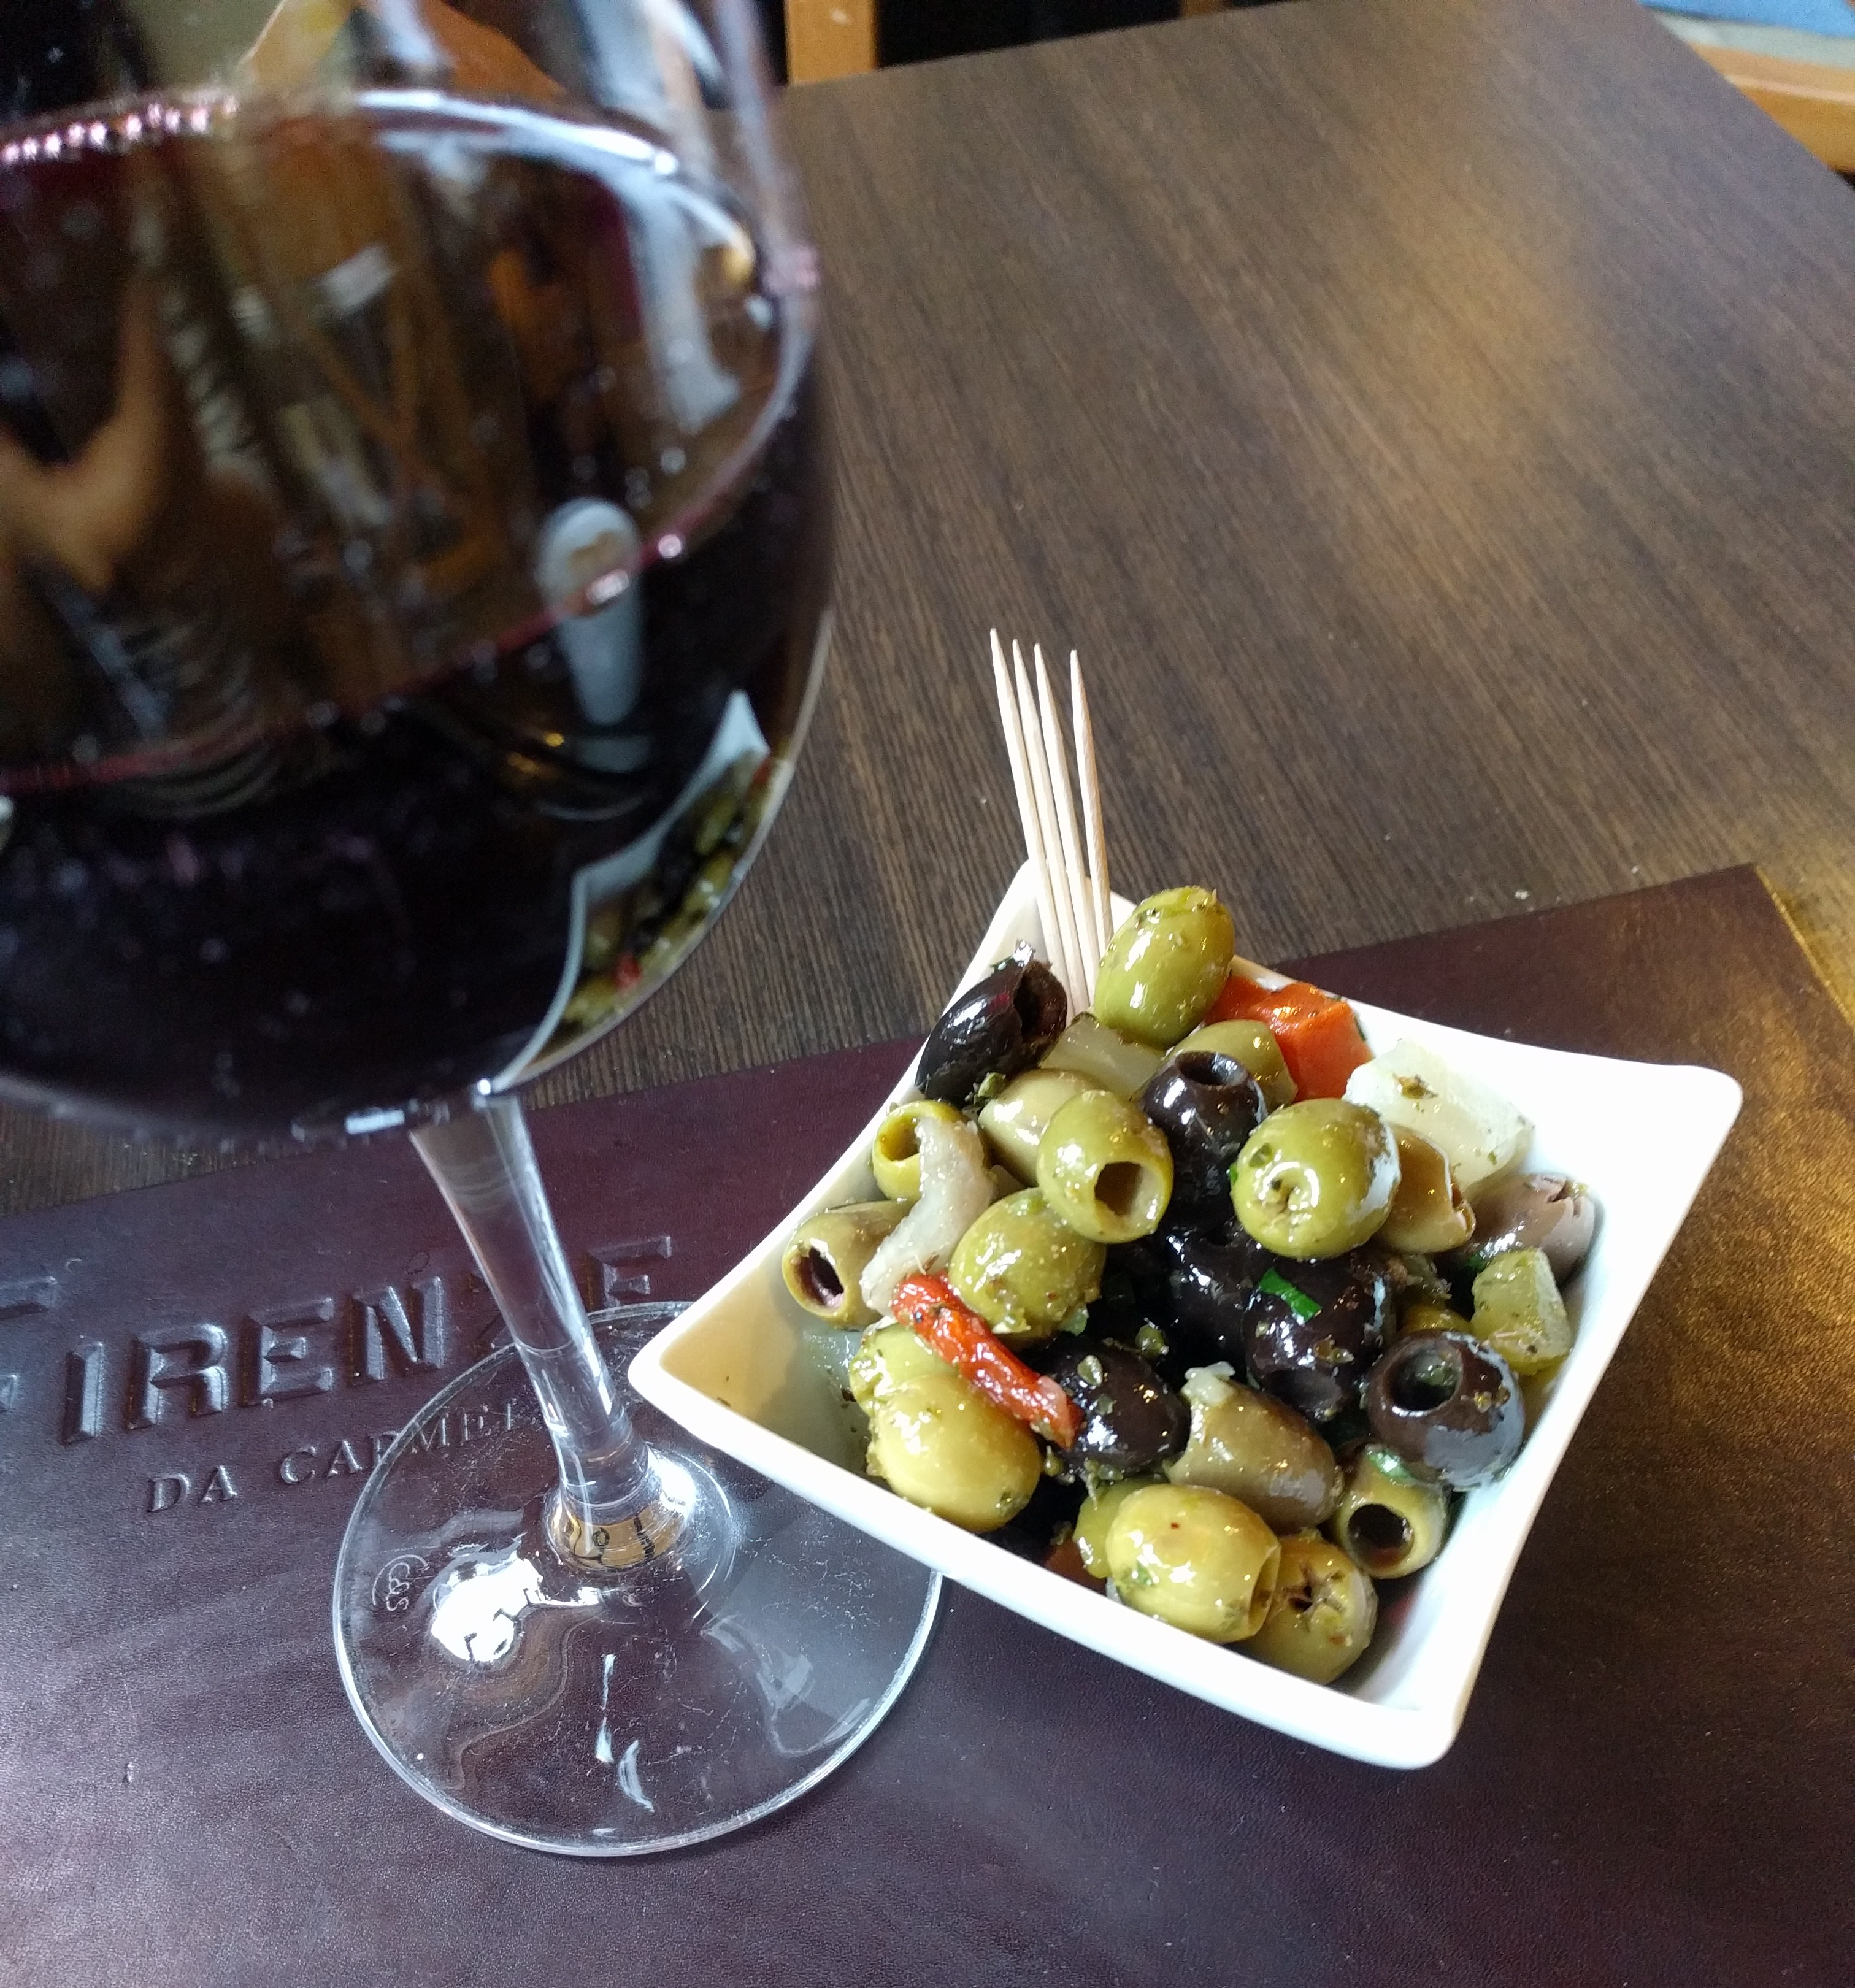
For drinks, I found a great little wine bar called Baravins. I liked the place so much I stopped by a second time during my visit. The bartender was friendly, helpful, and generous with the snacks.
I also ate some delicious Italian food while in Ghent. My friend and I had dinner at Shazanna after grabbing drinks at Baravins. Our pizzas were amazing and filling. My dinner and a glass of wine cost €22. I ate more Italian food a few days later when I visited Firenze for lunch. It is a cozy restaurant with a great family feel. If you are in the area, check it out.
On my way into town, I didn’t use public transportation when leaving the train station and hoofed it all the way to my hostel with my backpack in tow. But on my way out of town, I decided to take the tram to the train station. The cost for one ticket on the Lijnwinkel tram was €1.60. Later, I found out that this same transit system is in Antwerp, and possibly other cities in Belguim.
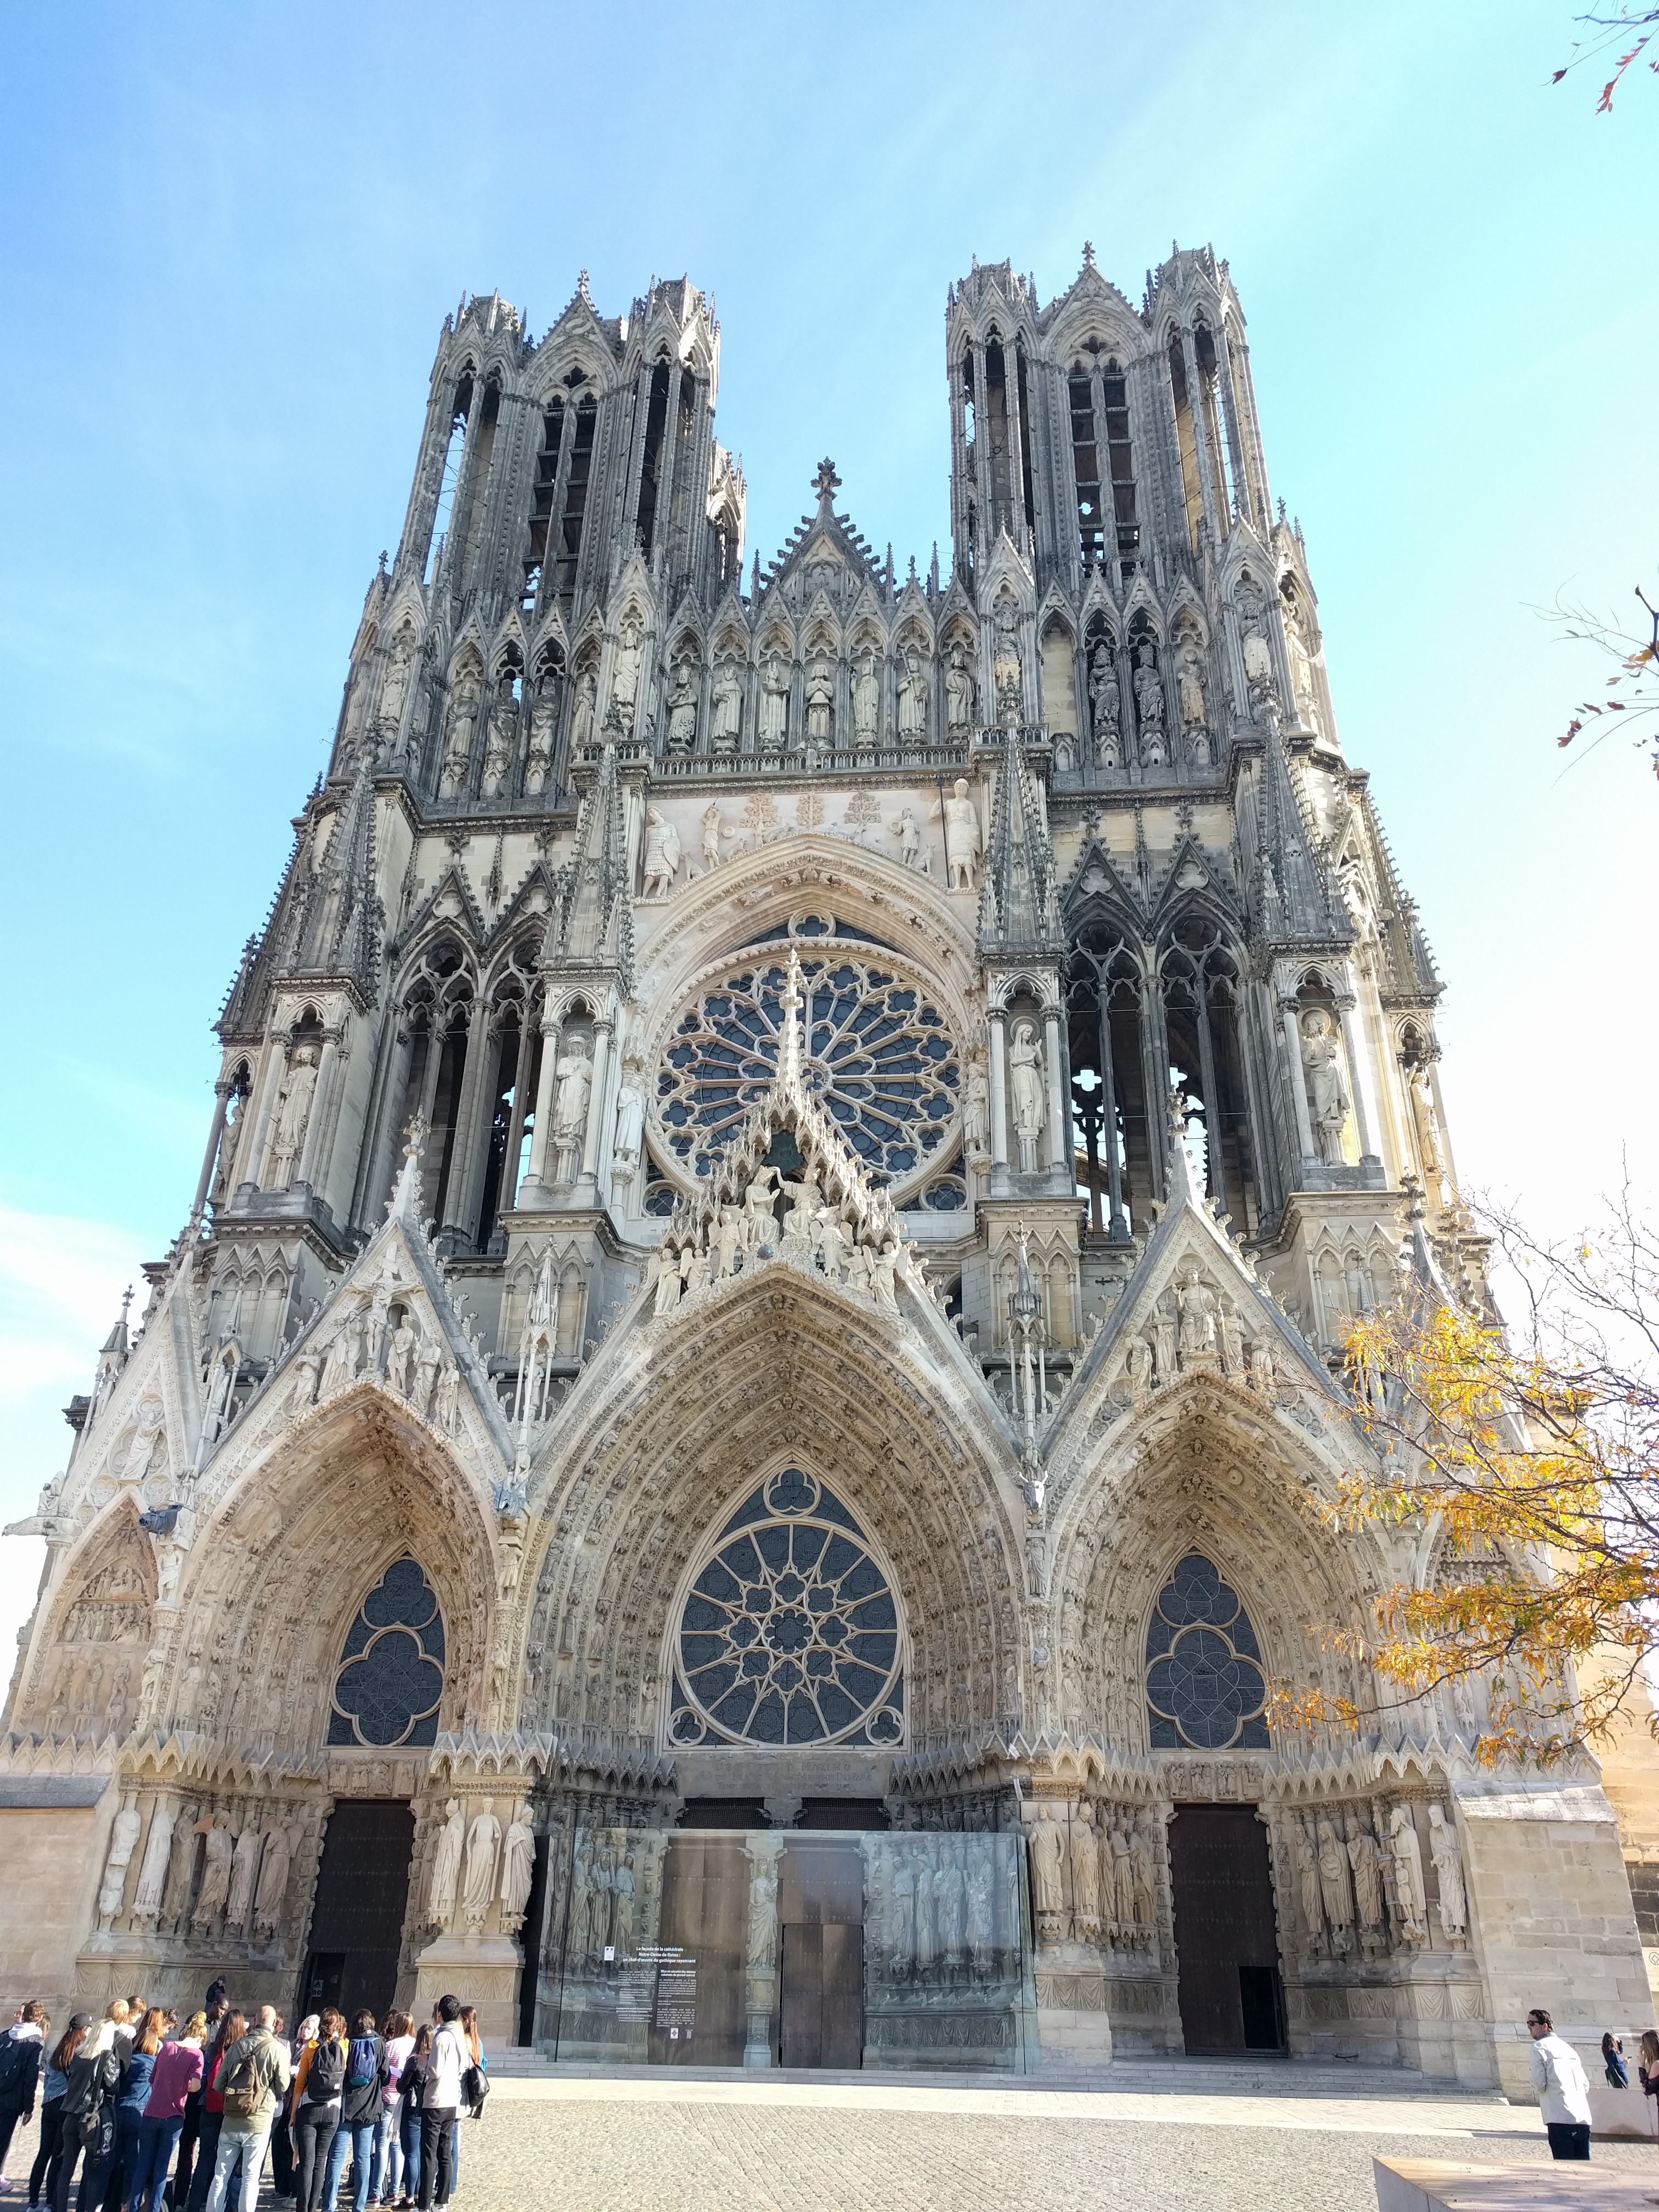
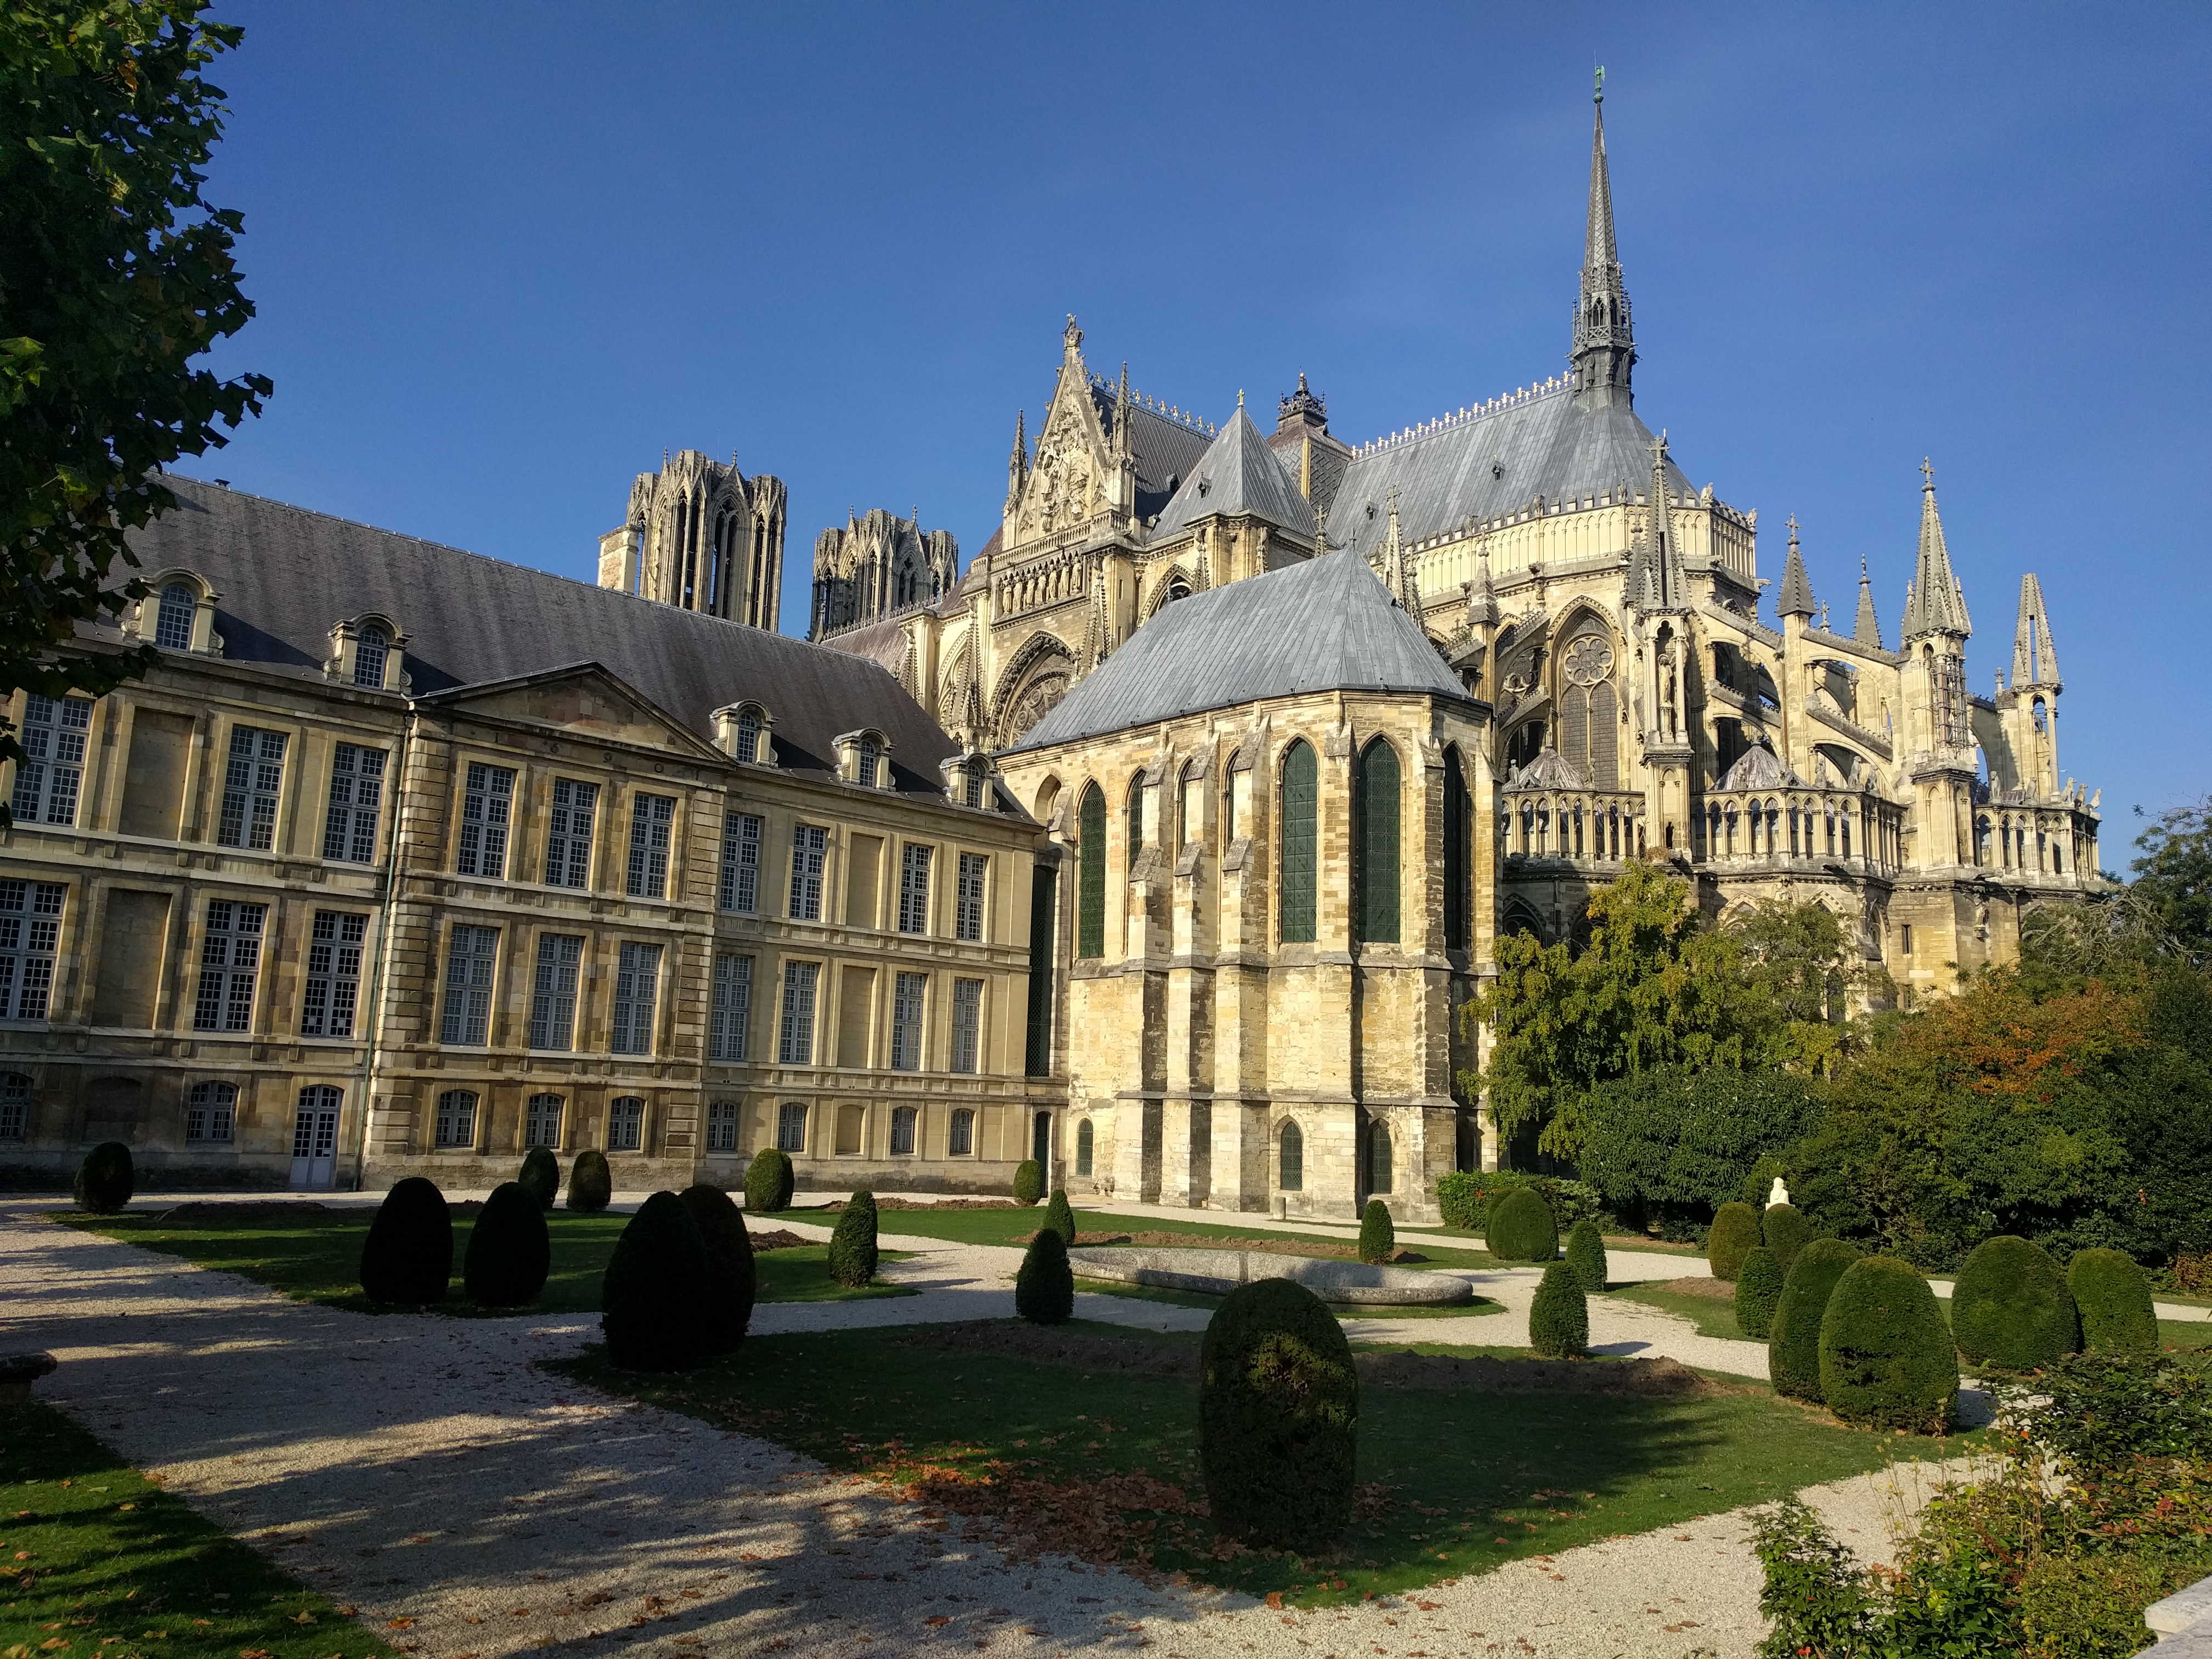
Reims, France
After spending a long weekend in Paris, I made my way to Reims for a few quiet days by myself. Most tourists probably spend an afternoon in Reims or skip it altogether, but not me. I was looking for a small, adorable town to wander through and that’s exactly was I got.
I booked an Airbnb for two nights on the southern end of town. My private bedroom with shared bath was stylish and oh so comfortable at $49USD per night. My host was friendly and helpful though her English was limited (as is my French). The apartment is a bit of a walk from the train station (Gare de Reims) in town but this did not deter me. Note that there is no left luggage facility at the Reims train station. There is, however, a new service called Nanny Bag that was suggested to me by the tourism office.
I visited both the cathedral and the basilica during my time in Reims. I cannot recommend these enough. Both buildings are awe inspiring to wander through. And, both are free. Plus, if you have just come from Paris, you will actually be able to enjoy and appreciate these spaces without hordes of tourists.


I also visited the Surrender Museum (Musée de la Reddition) and really enjoyed this small but significant piece of history. While I consider myself generally knowledgeable about World War II, I had never heard of Reims and the important role the city played.
While in town, I treated myself to a decadent lunch at Anna S. The prix-fixe menu was seasonal and delicious. It was such a filling meal that I did not eat dinner that night. It was my only splurge while in town but at €42 (which included a glass of wine), it was well worth it.
I also ate some mussels while in town. I researched a few places but my Airbnb host recommended Le Grand Café and she did not steer me wrong. Once again, my meal was accompanied by wine (when in Rome…) and cost €22.
After two days in Reims, I was ready to move on to my next destination. For this, I needed to make my way out to the high speed train station (Gare Champagne TGV) just outside of town. I searched and searched (using my cell phone) for good information on local buses and tram lines and came up empty handed. Later, I was able to find this online map for the trams and local buses which opened on my laptop.
Before boarding the tram, you must buy a ticket and then validate it once on the tram. There is an option for paying via cell phone but I didn’t research this as I only used the tram once. The city is not that big and I love to walk and explore.
